Diy knotless braids for my sister: a labour of love.
As a Diy enthusiast, I love the thrill of doing things myself. Doing things myself has helped me save a lot of money so I am open to learning beneficial new skills. Hair-making is one of my self-taught skills and last weekend I put that to good use by making my sister's resumption hair.

She wanted short braids with curly ends which would typically cost her about $10 or even more at the salon. I decided to help her with it so she could use the money to buy other essentials she needed for school. This is not the first time I am making it for my sister so I thought it would be easy and fast but unfortunately took longer than I anticipated, but in the end, the result is so beautiful.
THE PROCESS
Material needed: I use leftover braid extensions we have at home, hair oil and cream, rope for the curls, and scissors for trimming.
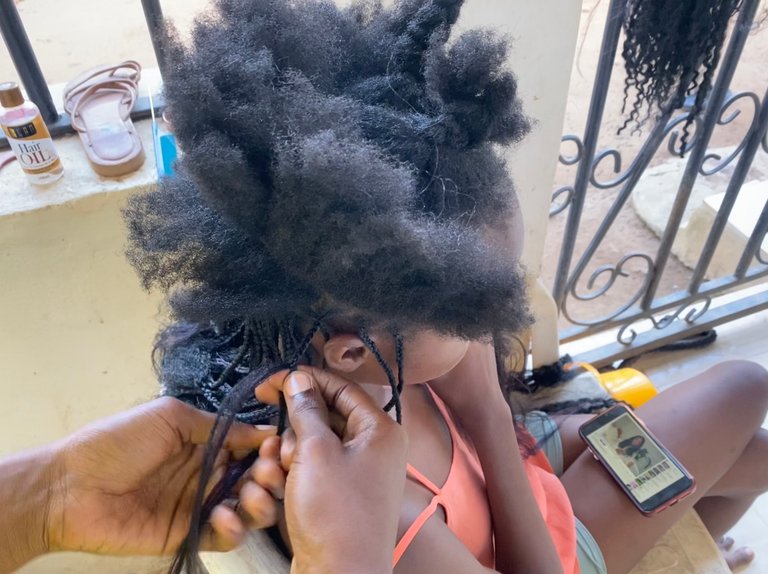
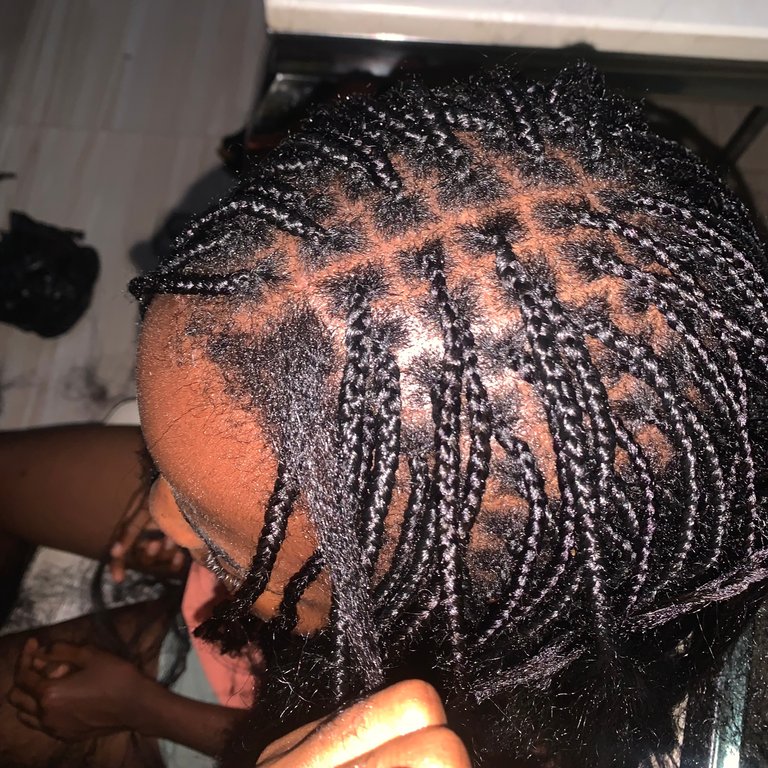
Parting the hair.
I divided the hair into 3 main parts.
Which is the front, the middle and the back.
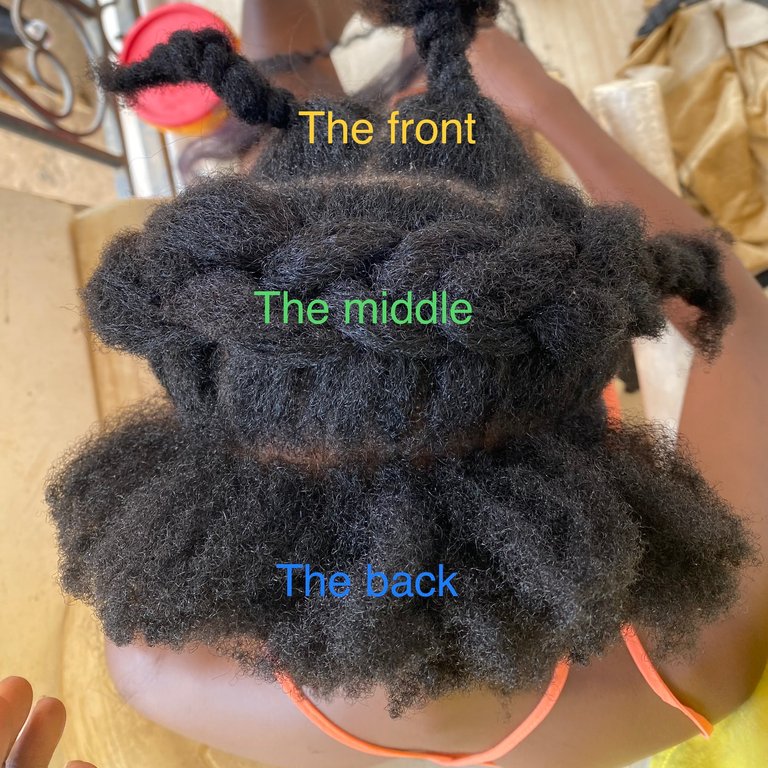
This makes it very easy to part the hair further into smaller sections.
Braiding the hair
I start from the back and part the hair into tiny boxes and start braiding .I tried to do a bricklaying effect but I didn't quite get it but still giving.
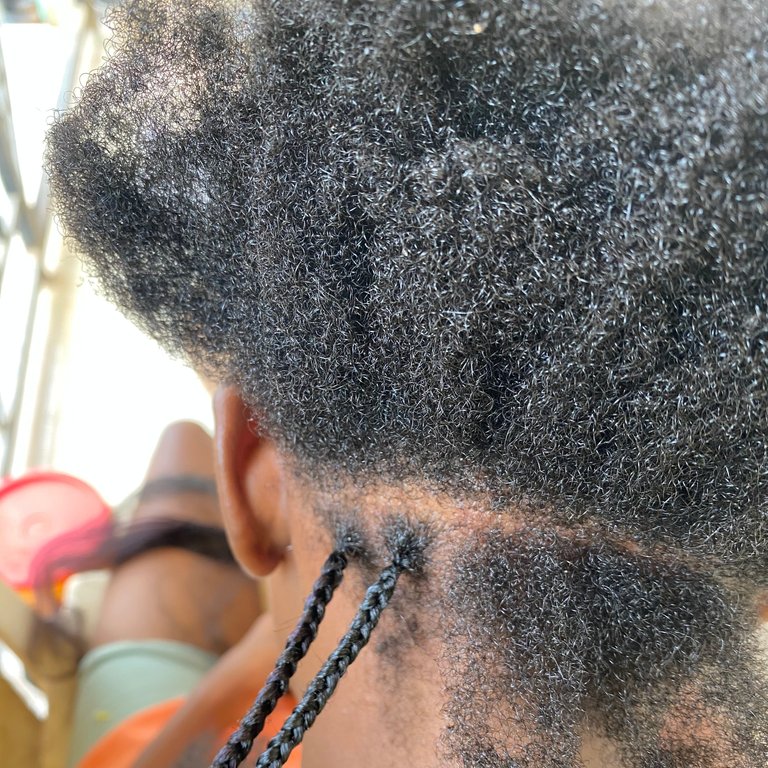
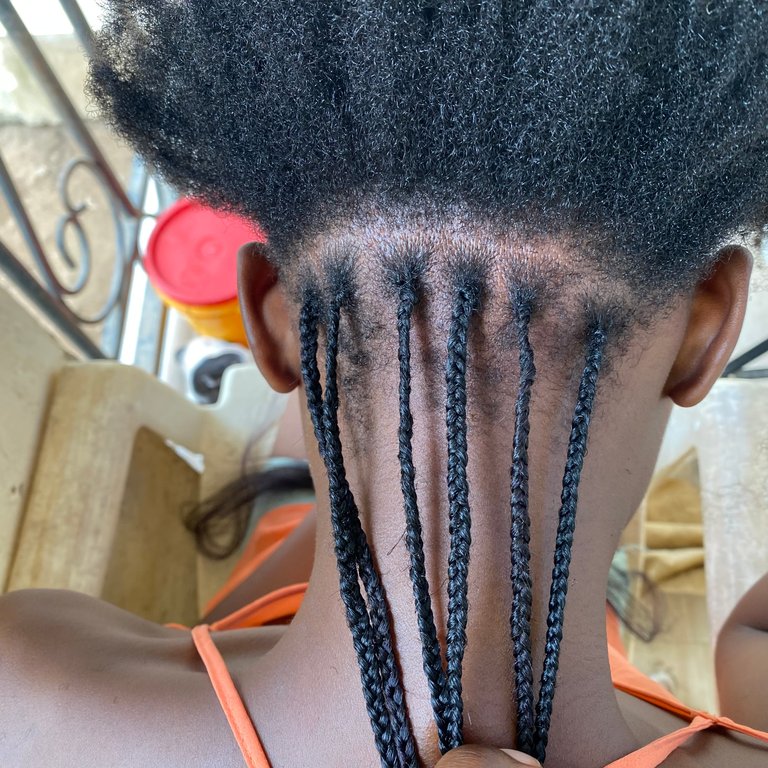
I started braiding from the back part, I continued with the middle part then finally the front part
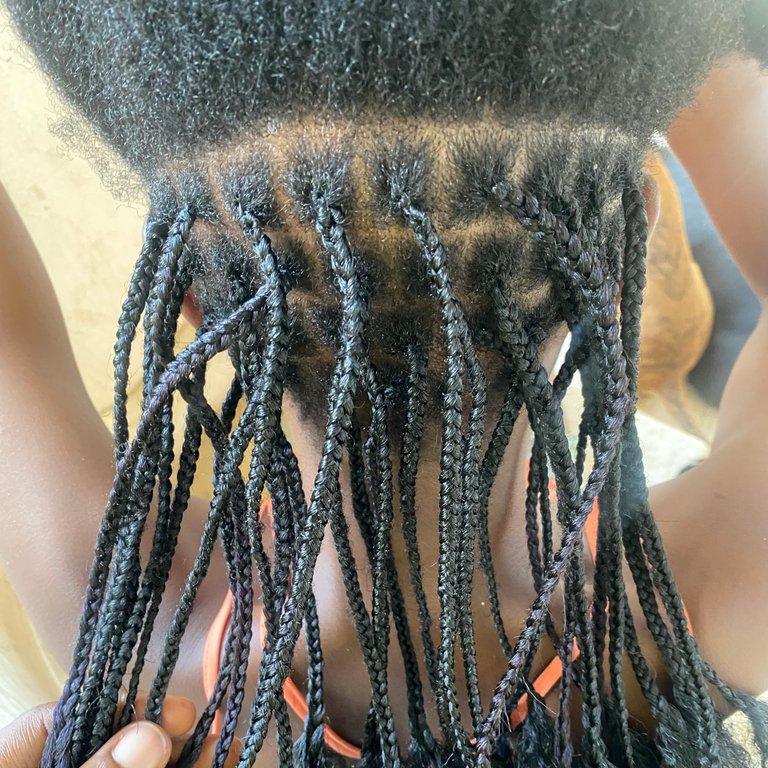
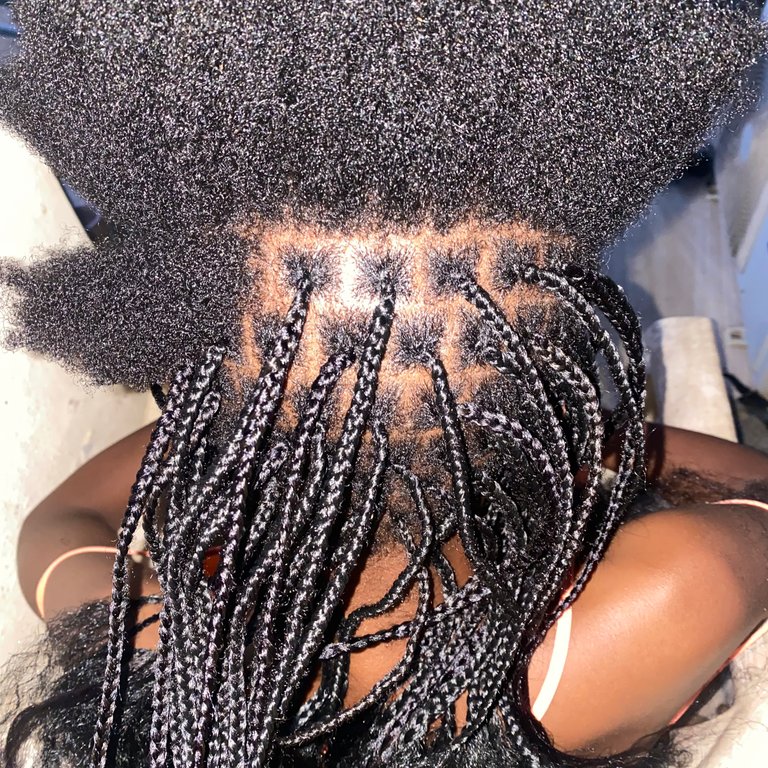
That feeling when it just one box left to braid.
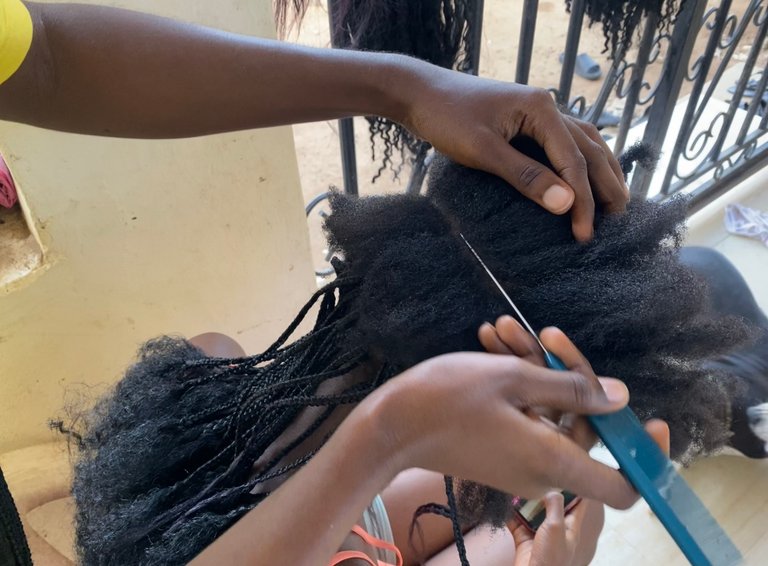
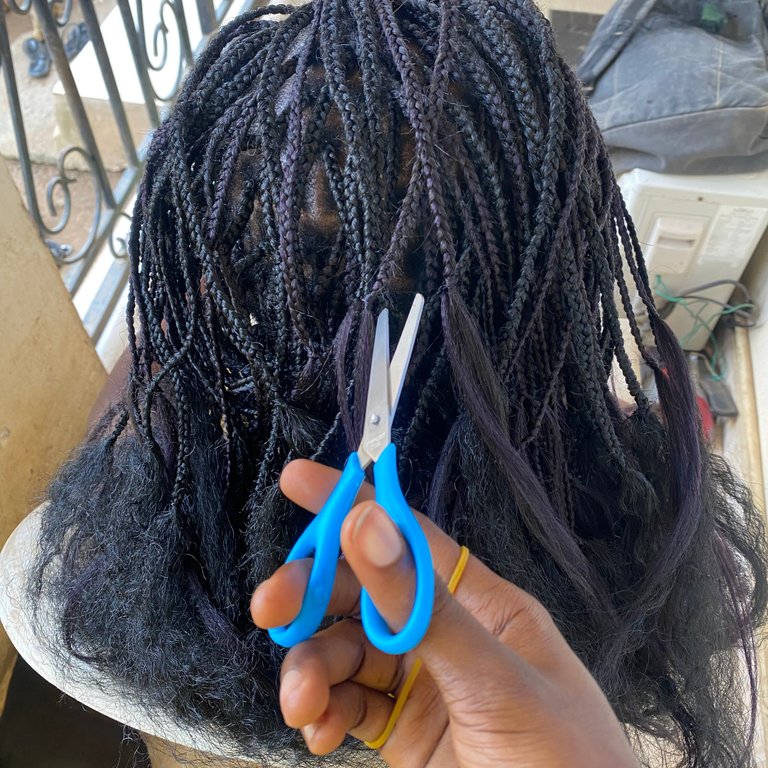
After braiding it halfway I tie a knot through each braid to keep it from losing. I trimmed and neat the braids (this is kinda the hardest part cause I have to be very careful and patient and I have zero patience cause I was already exhausted)
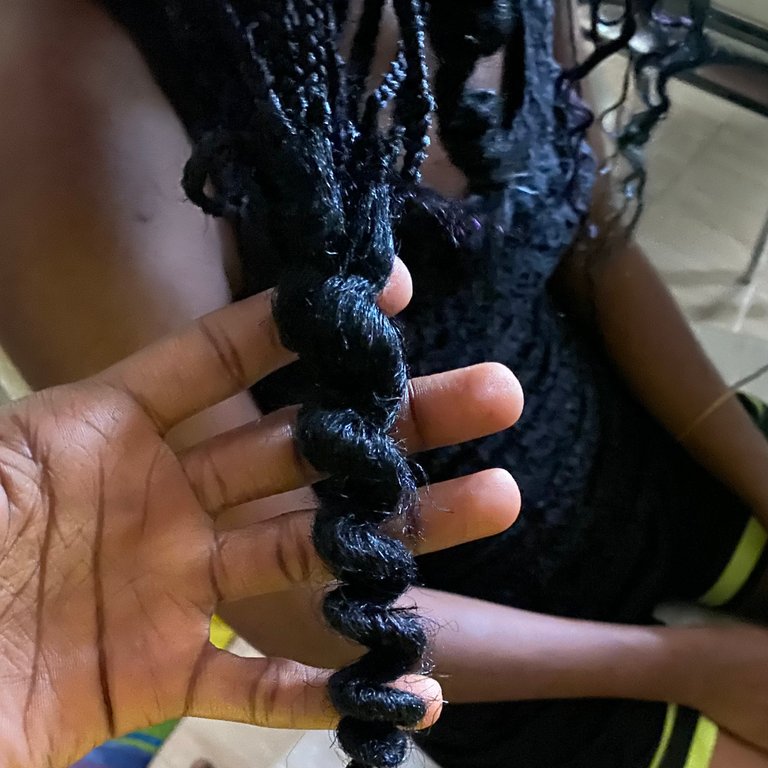
The Curls
I use rope to curl the ends of the braids. All I did was to loosely wrap the rope around the part I wanted to curl and pull gently. I tried it at the beginning and the end as well so the rope won't lose. Then I dip the hair in hot water, especially the curls. This will help the curls set and also help the hair relax.

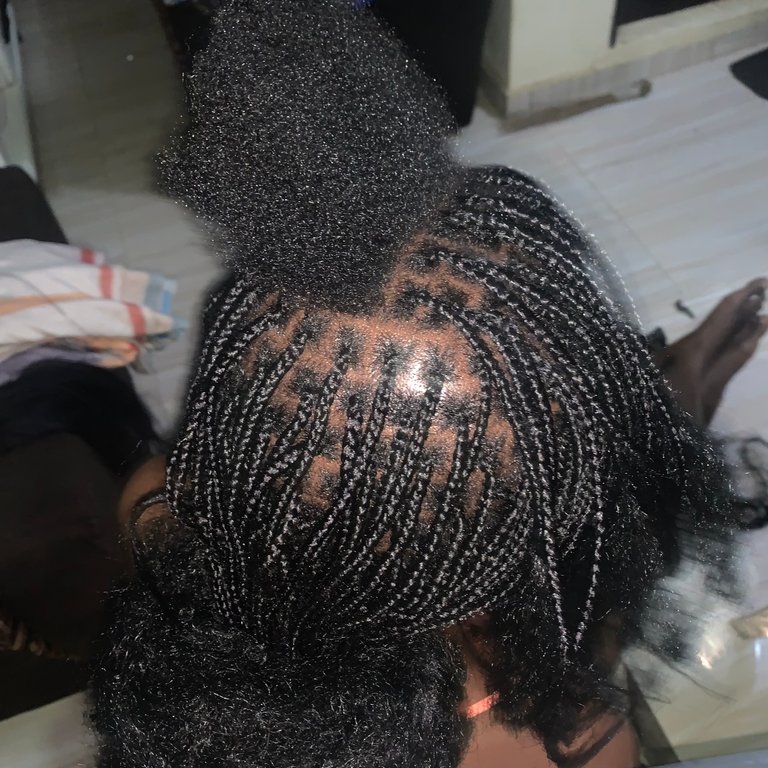
The result
Once the hair was dry, I carefully cut the rope and this is the final result
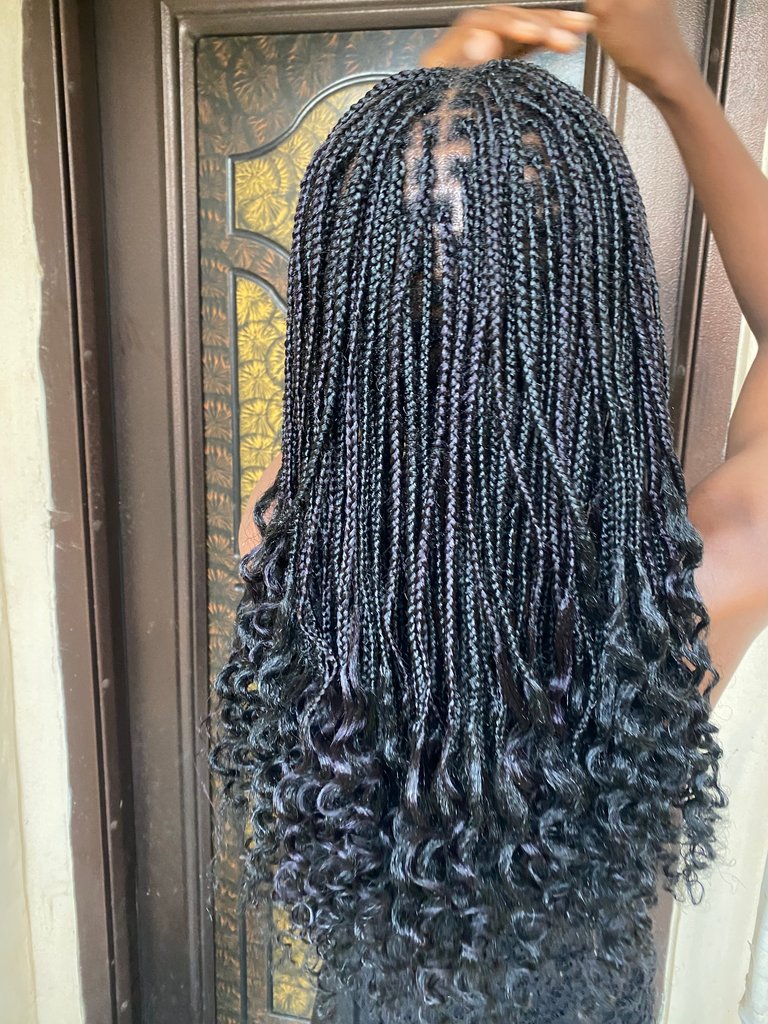
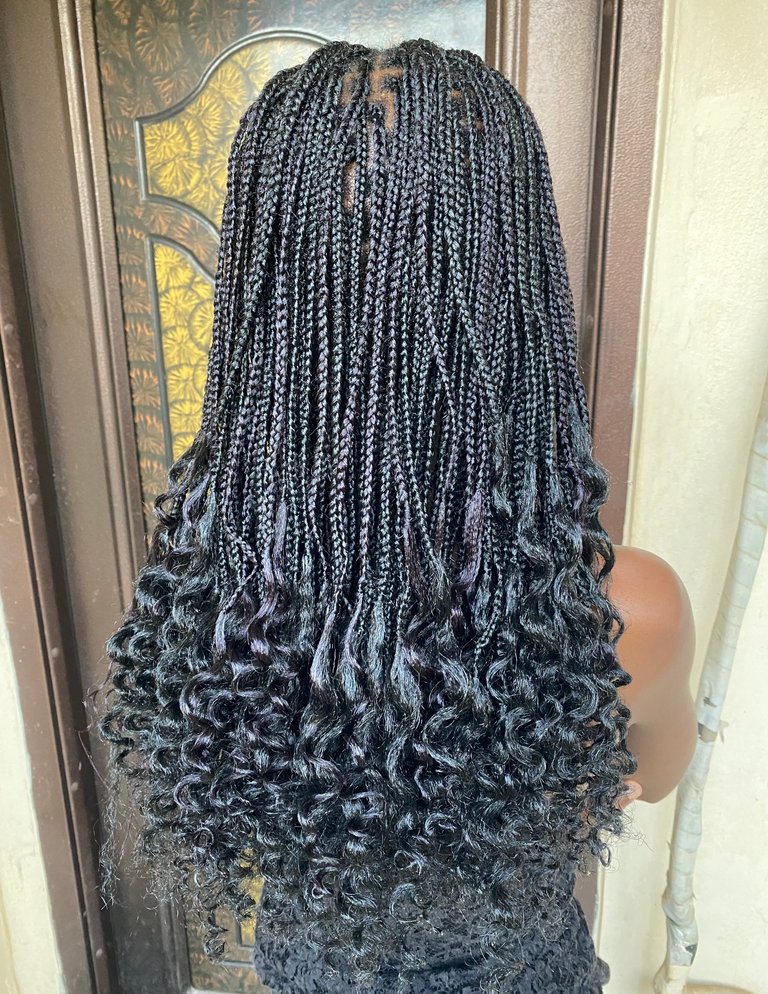
My sister loved the hair and also the fact that I saved her money. This braid took about 14 hours to make. I didn't expect it to take that long but even though I was tired I was relentless and focused on making the hair and seeing the result. This is a labour of love and every minute spent is worth it.
Learning little Diys can save a lot of money and even help you render help to your loved ones. I am so happy with the result of the hair and the 14 hours spent is worth it. I am sure this will even be worth more if done from a salon but look what Diy has helped us achieve with some leftover extensions and determination.
Thank you for visiting my blog and stay creative ❤️
All images are mine and thumbnail using canva
Posted Using InLeo Alpha
Being able to try things yourself is superb, the braids came out so beautiful. I am sure with time you will spend little time making the hair.
Yh, hopefully
Thanks for your comment
Wlcccc
Your knotless braid looks flawless, great work!
Thank you so much
Wow!😍
That’s so good. Please when can I book an appointment?
Yes please 😂
I’ve texted you on discord🤭