Marking the start of my RISING STAR Journey: A Pizza Box and a Coffee Cup

I just started my Rising Star journey.
And in less than 24 hours, I reached level 5 and was able to perform at mid-week support slot. Also manage to earn 977 Starbits.
I can’t sing so I imagine myself to be the manager and not the performer. 😅
I like this kinds of game as I can do other things while playing. I can play it simultaneously with other games like Splinterlands.
I was so excited that I started to play the game before reading any tutorial or articles about the game. Thus, I missed a few tips. 😁
One of the main things that I should have invested first is a PIZZA BOX. I found a total of 3 PIZZAs within around 30 mins. Since I don’t have a PIZZA BOX, my performer has to eat it one after the other and not maximizing its effect.
One of the thing that I’ve found that I could have stored are COFFEEs. Again, since I don’t have a COFFEE CUP, my performer has no choice but to drink it all up one after the other.
If I have pizza box and or a coffee cup then the BOOSTING effect of the pizza and the coffee could had been maximized.
I wanted to buy the pizza box first but I don’t have enough resources to do so. I only managed to purchase a total of 4,650 Starbits. I used 1,000 Starbits trying out music promotion. I am now down to 3,650 Starbits (+977 in game rewards).
To mark my entry to the Rising Star industry, I decided to model a COFFEE CUP and a PIZZA BOX. I manage to do this while playing the game. It reminds of a saying that goes, “If you can’t buy it, build it”. 😁
Anyways, I discuss my modeling process below.
My ArtProcess
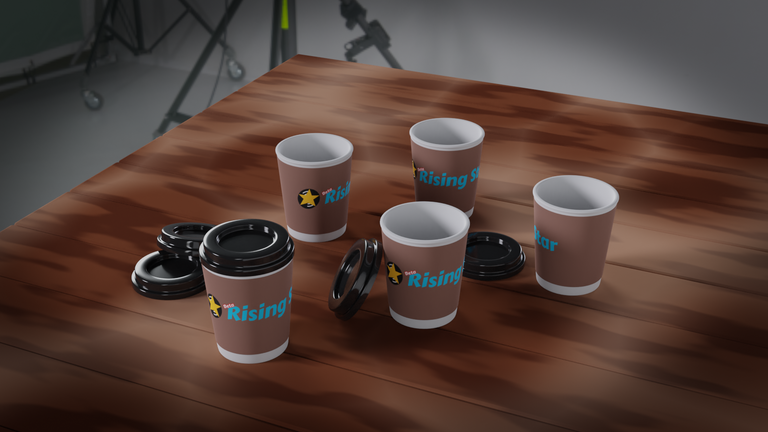
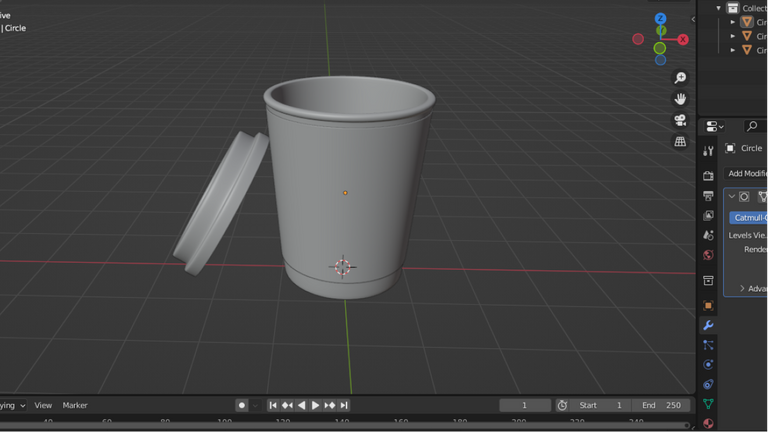
Modeling the Coffee Cup
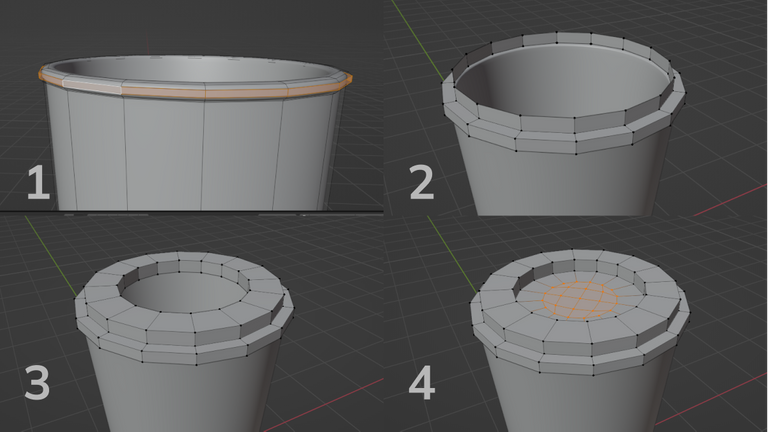
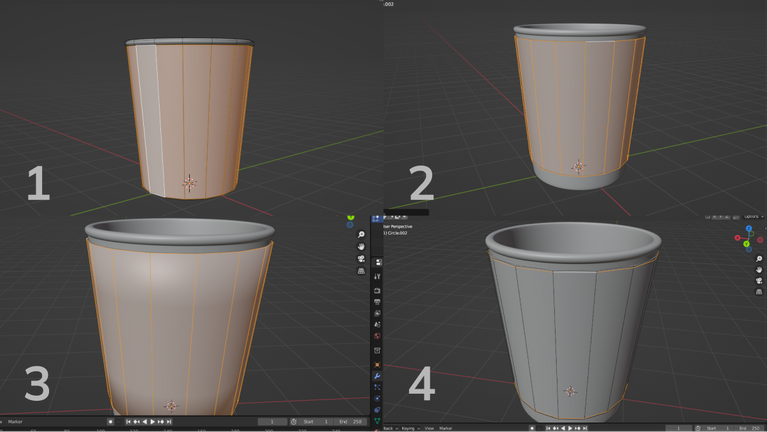
I started with the coffee cup. I used a circle and then extrude it up. I gave it thickness and then worked on the lips.
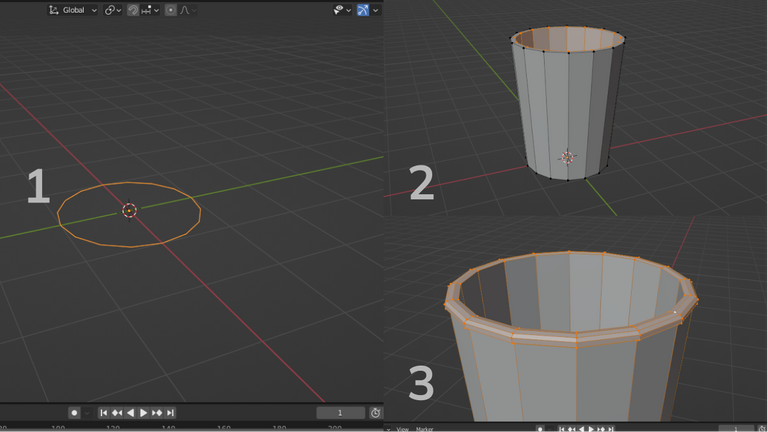
After that, I closed the bottom part.
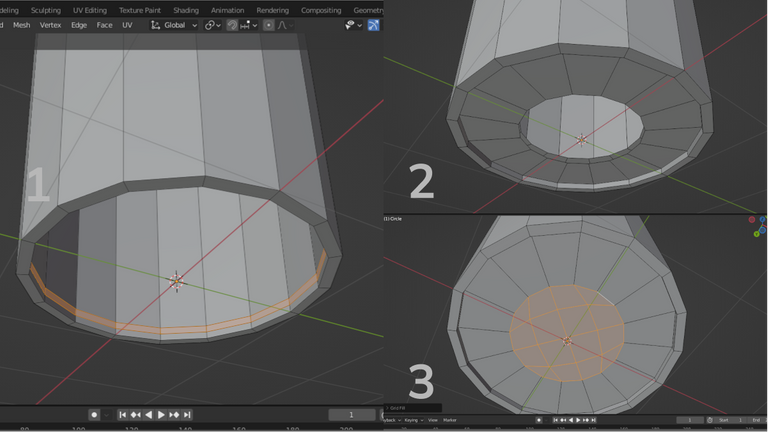
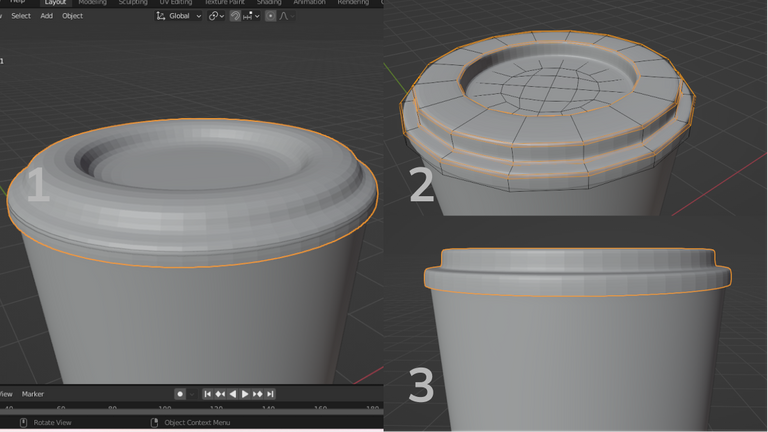
To smooth things out, I added a subsurf modifier. This inherently smoothens all of the edges. I added proximity loops on the parts where I don't want the smoothing effect be applied.
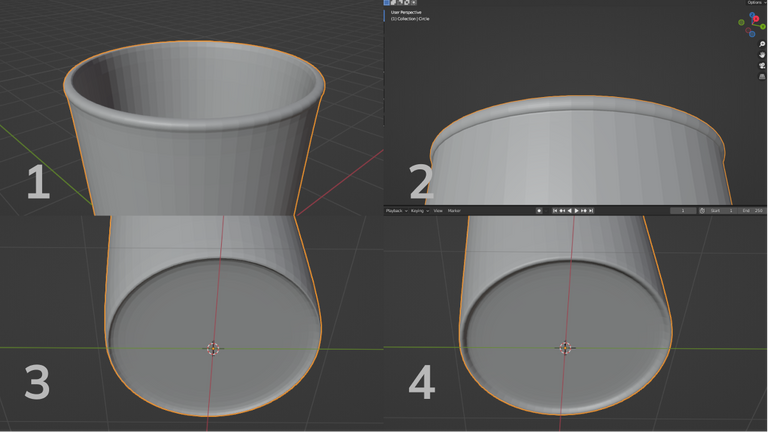
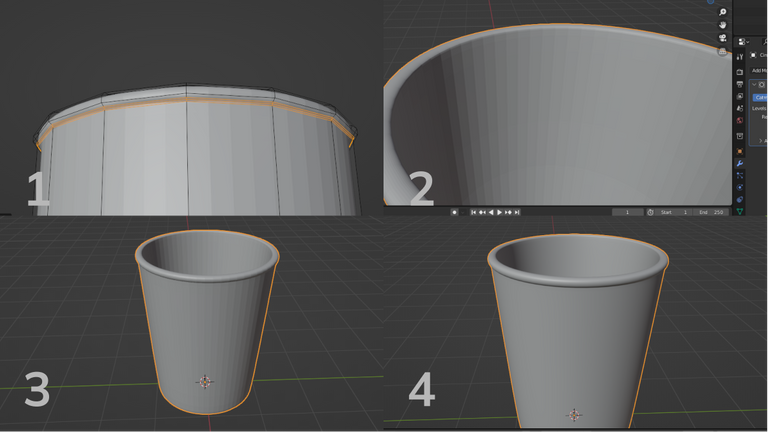
I am not satisfied with the look of the lips of the cup so I did a few adjustments. I finalize the cup model by smoothing the shading.
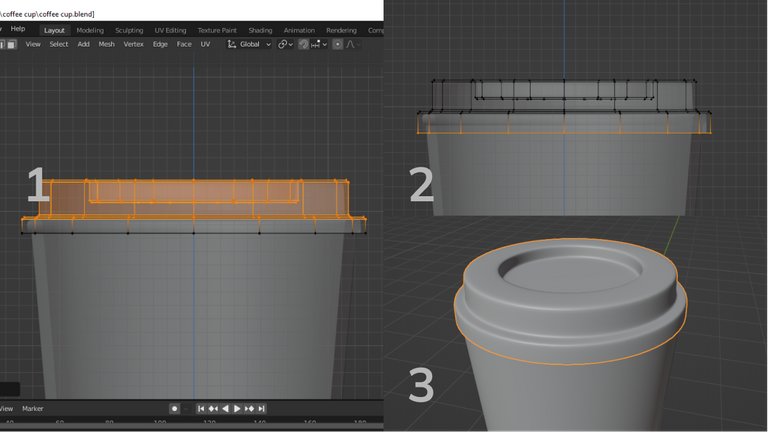
I worked on next on the cup cover.
Same with the cup, I added a subsurf modifier. After that, I added necessary proximity loop on parts where the smoothing effect is not desired.
The cover is looking thin so I pulled some vertices up and down.
I proceeded next to the cup sleeve. It's geometrically similar with the cup. I give it a thin thickness and then a subsurf modifier. I finished it by adding necessary proximity loops on the edges.
I went back to the cup cover and also added proximity loop on the edges when I noticed that the shading is not uniform.
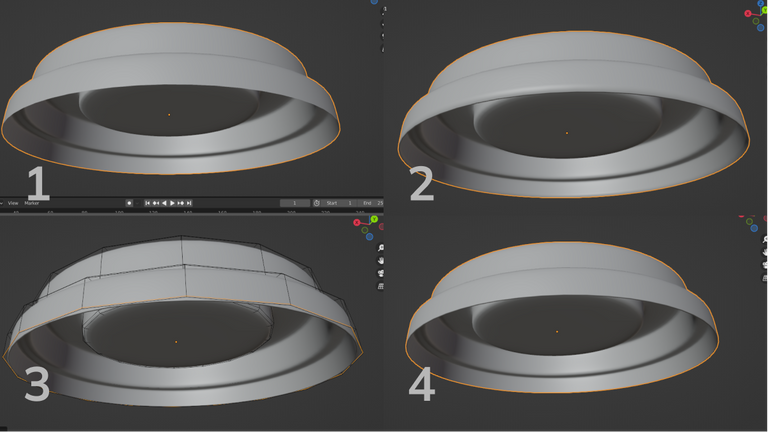
I finally put the cup cover on the side, resting on the cup itself.
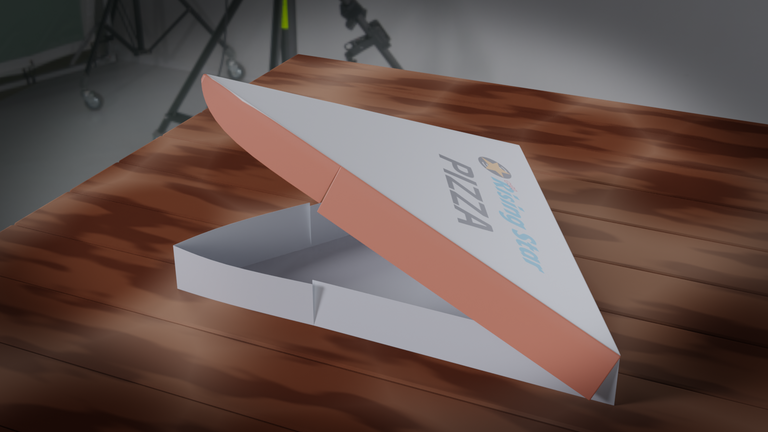
Modeling the Pizza Box
I started with a circle with three vertex. I extruded it up to make the box sides. I duplicated it for the cover and then finally filled the open faces.
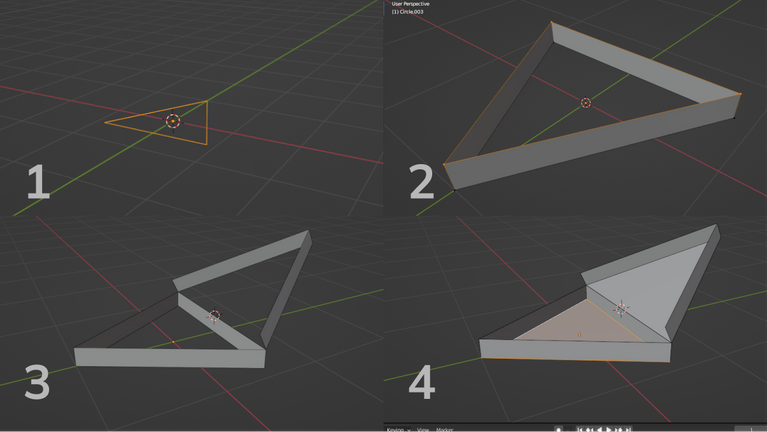
I added a subsurf modifier to make those curve edges. I added proximity loops and crease the edges.
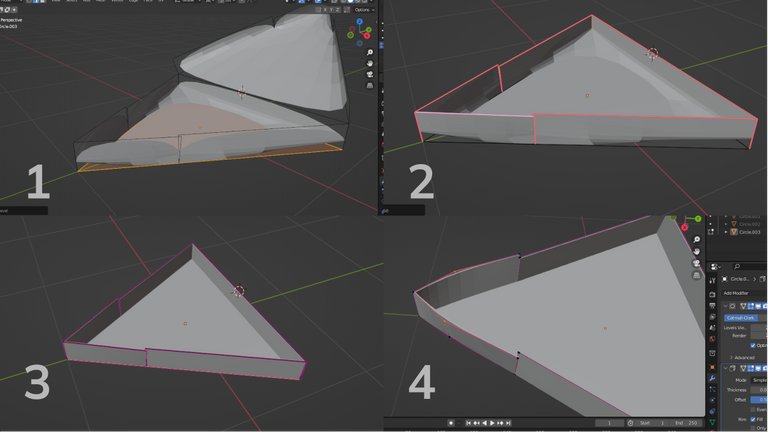
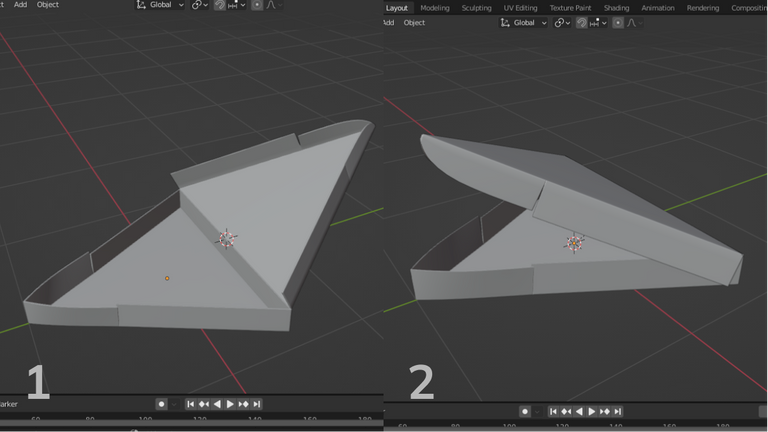
Finally, I lowered the top cover but not completely covering the bottom part.
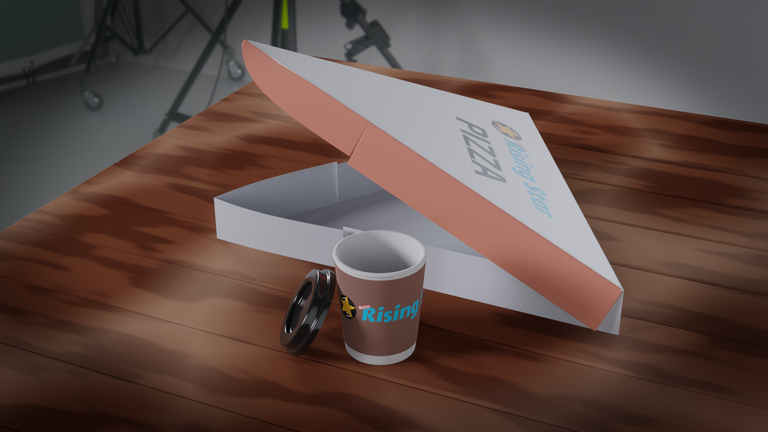
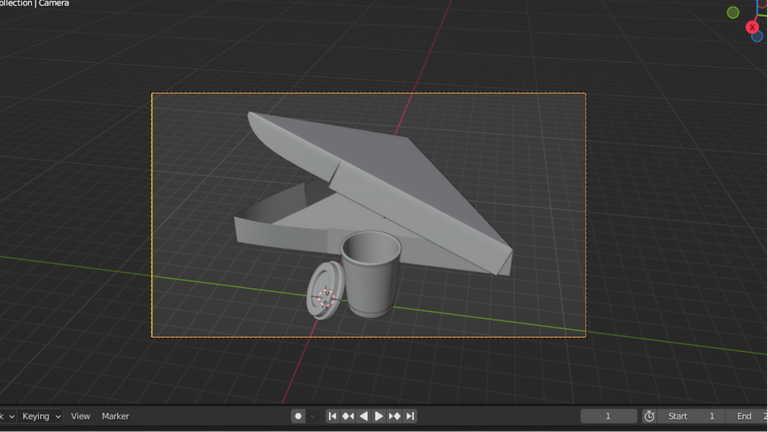
Building the Scene
I thought of a simple scene. I place the pizza box and the coffee cup side by side. They're empty waiting for someone to pour coffee and drop a slice of pizza. 😁
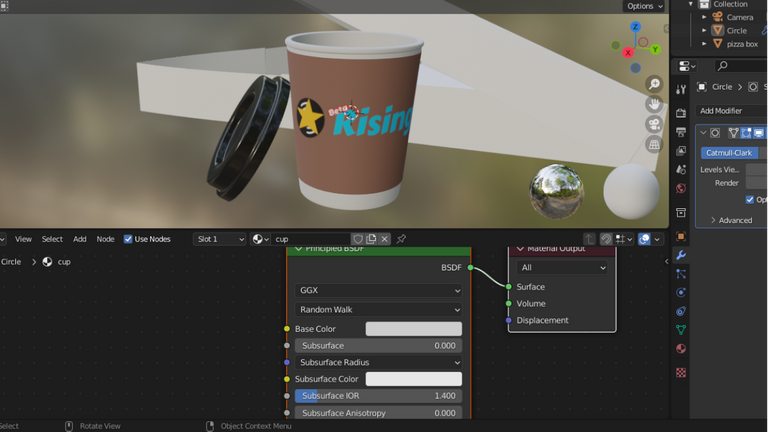
Shading
I made the cup cover colored black and made it reflective giving it the impression that it is made of plastic.
For the cup, I made the color a little off-white and non-reflective. Making it more like it's made of styrofoam.
For the cup sleeve, I used an image texture that I edited using Krita.
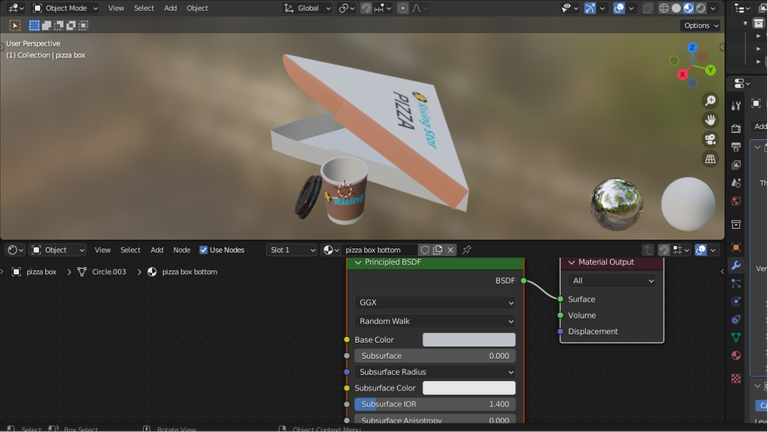
For the pizza box, I used a combination of a material node and an image texture. I used an image texture for the top cover which I also edited in Krita.
The Table Top
I usde a plane for the table top. I added loop cuts with the intention of making wooden planks out of it.
I separated the divisions, give it thickness and bevel on the edges.
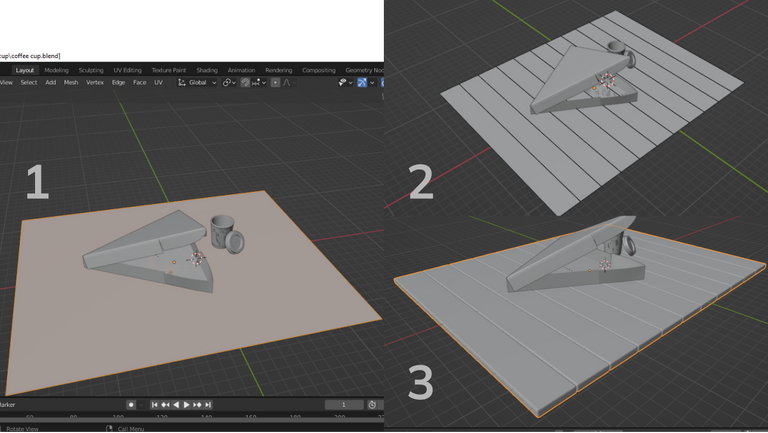
I used a simple procedural texture to give it the impression that it is a wood.
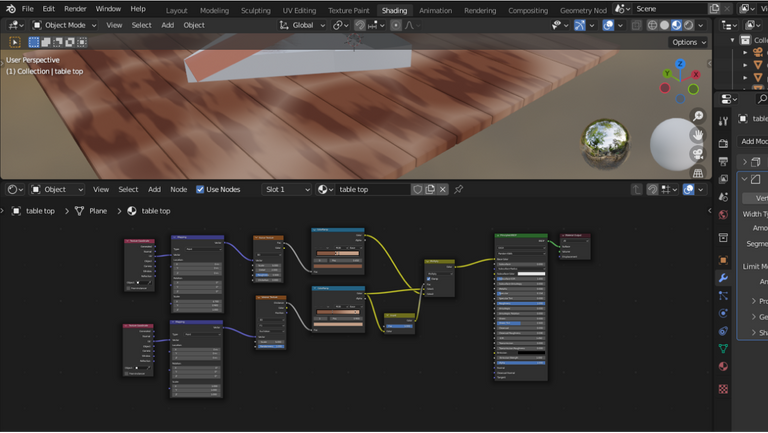
After that, I finalized my scene by adjusting the objects and the camera.
Compositing
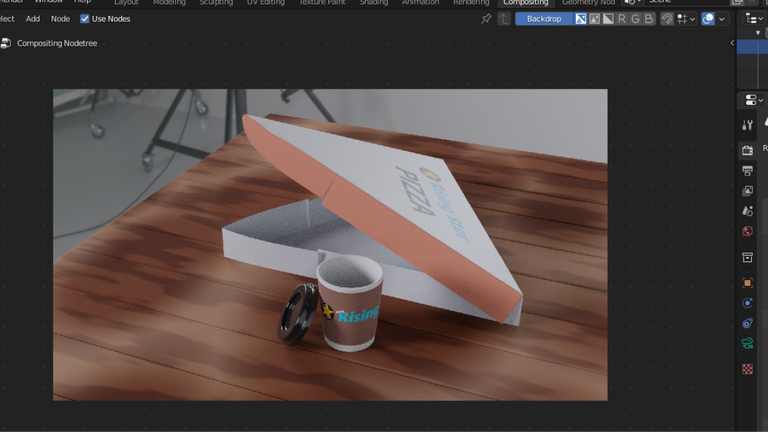
I used Blenders' compositor to place a gradient on top of the rendered image. This will guide the viewers eye to my models and less on the background.
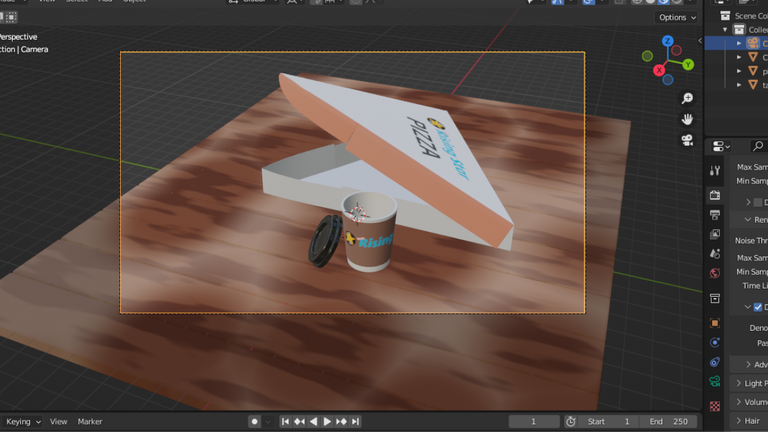
Before compositing
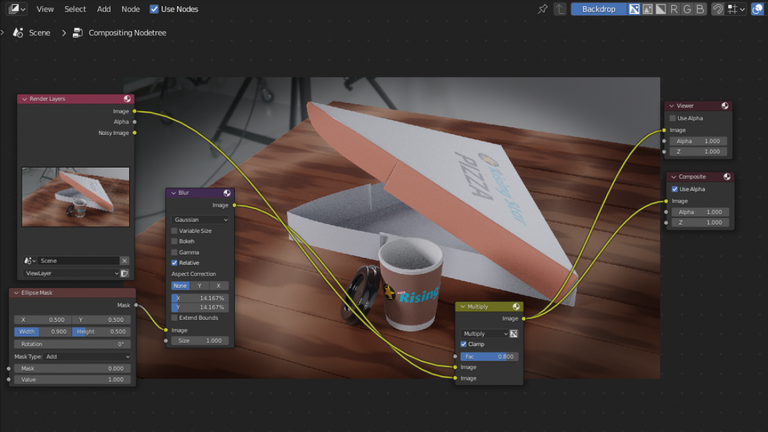
Compositing node tree with the rendered image being affected.
First Impressions
I really like this kinds of games that doesn’t need your total focus. It enables me to do other things while playing.
I’ve enjoyed playing the game, despite not able to keep the pizzas. I decided to continue to play the game and see if I can manage my performer to reach stardom.
As a newbie Rising Star player, I would love to hear your thoughts.
Any advice and suggestions would be greatly appreciated.
Please don’t be shy and drop them in the comments below.
Thank you and more power.
Attribution:
Logo used in the texture belongs to Rising Star.
3D objects are modeled, rendered, shaded and composited in Blender.
Texture images used are edited in Krita.
Thumbnail and process images are edited in Figma.
Good luck with your Rising Star journey.
That is a cool coffee cup and pizza box, 😀
!PIZZA
!PGM
100 PGM token to send 0.1 PGM three times per day
500 to send and receive 0.1 PGM five times per day
1000 to send and receive 0.1 PGM ten times per day
Discord
Support the curation account @ pgm-curator with a delegation 10 HP - 50 HP - 100 HP - 500 HP - 1000 HP
Get votes from @ pgm-curator by paying in PGM, here is a guide
Create a HIVE account with PGM from our discord server, here is a guide
I'm a bot, if you want a hand ask @ zottone444
Thanks. 🙂
PIZZA Holders sent $PIZZA tips in this post's comments:
nupulse tipped thecuriousfool (x1)
kraaaaa tipped thecuriousfool (x1)
@thecuriousfool(1/10) tipped @risingstargame (x1)
thecuriousfool tipped nupulse (x1)
Please vote for pizza.witness!
!PIZZA
Thanks.
!PIZZA to you too. 🙂
Congratulations @thecuriousfool! You have completed the following achievement on the Hive blockchain and have been rewarded with new badge(s):
Your next target is to reach 900 upvotes.
Your next target is to reach 500 comments.
You can view your badges on your board and compare yourself to others in the Ranking
If you no longer want to receive notifications, reply to this comment with the word
STOPSupport the HiveBuzz project. Vote for our proposal!
This post has been manually curated by Rising Star Game
The NFT based music career game built on HIVE
!PIZZA
!LUV
@risingstargame(1/4) gave you LUV. wallet | market | tools | discord | community | <><
Thanks a lot! 🙂
!PIZZA