Cambio de engranajes plásticos de una batidora / Replacement of plastic gears of a blender.
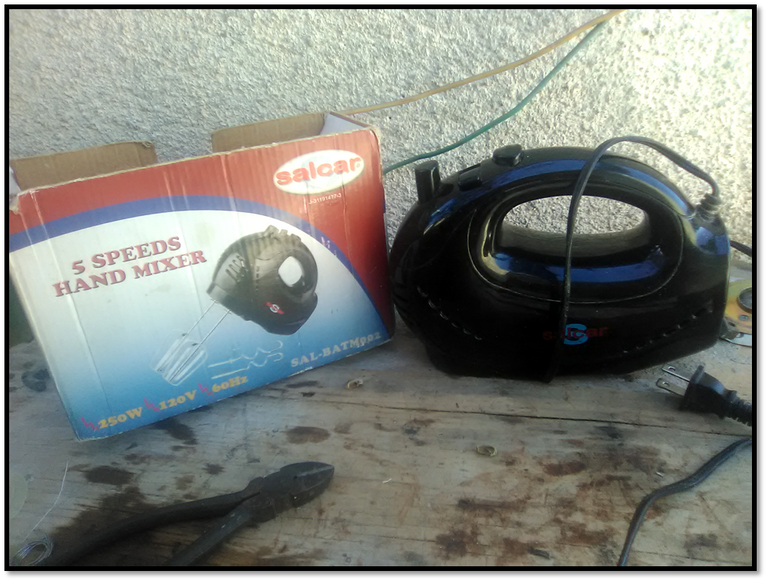
Hola queridos hermanos de hive motors, saludos y bendiciones. En esta oportunidad les traigo una reparación de una batidora de 5 velocidades, esta presenta una falla donde las paletas de batir no giran. Lo primero que haremos es destaparla y luego inspeccionamos visualmente la parte interna de la batidora.
Hello dear brothers of hive motors, greetings and blessings. In this opportunity I bring you a repair of a 5 speed mixer, this one has a failure where the beating paddles do not rotate. The first thing we will do is to uncover it and then visually inspect the internal part of the mixer.

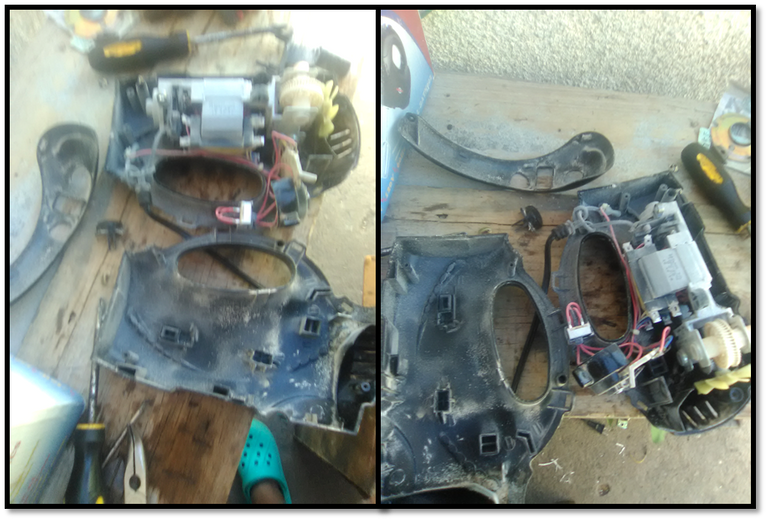
Como pueden observar en la fotografía, la batidora presenta desgaste en los engranajes y esta bastante sucia de residuos de harina de trigo y otros elementos utilizados para prepara tortas. Terminamos de separar el motor de la carcasa para empezar a quitar el polvo de la parte interna.
As you can see in the photograph, the mixer shows wear on the gears and is quite dirty with residues of wheat flour and other elements used to prepare cakes. We finished separating the motor from the housing to start removing the dust from the internal part.
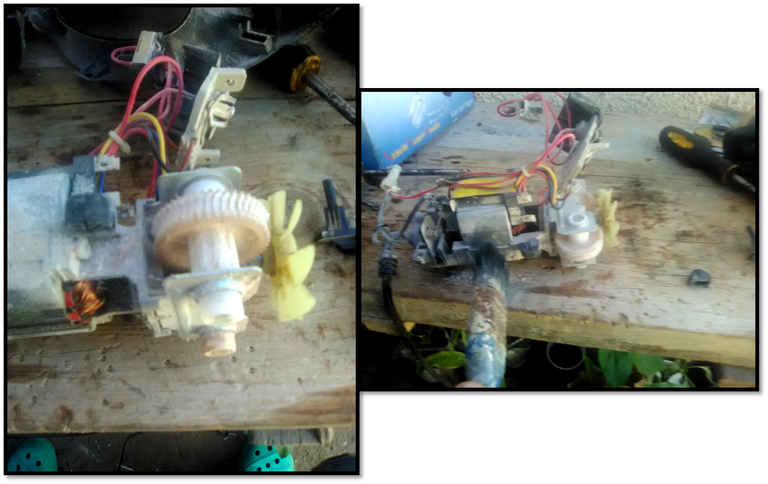
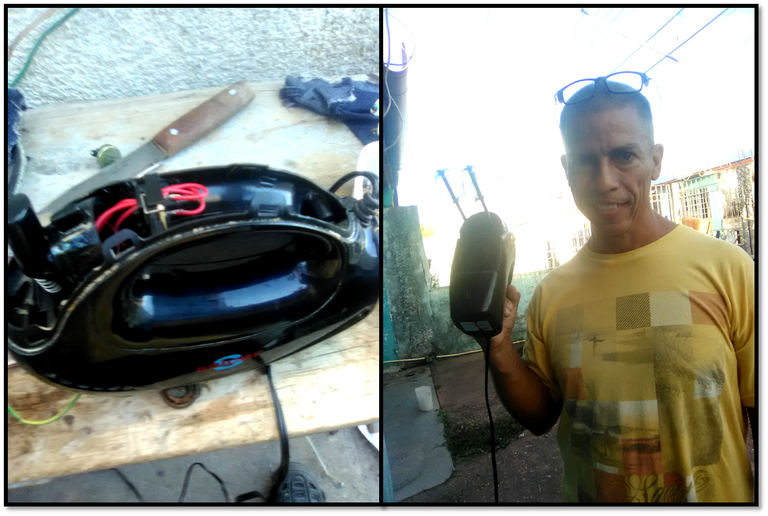
Tomamos una pequeña brocha, pincel o soplador, lo que tengamos a manos y comenzamos a remover todo el polvo, luego para retirar los engranajes dañados tomamos la hélice, la cual le suministra aire para refrigerar el motor, con mucho cuidado de no partirla, si esta muy dura tomen dos destornilladores de pala y hagan palanca con mucho cuidado y saldrá fácilmente. Retirada la hélice tomamos un destornillador de estrella y sacamos un par de tornillos que contienen las bases de los engranajes.
We take a small brush, brush or blower, whatever we have at hand and begin to remove all the dust, then to remove the damaged gears we take the propeller, which supplies air to cool the engine, very careful not to break it, if it is very hard take two bladed screwdrivers and pry very carefully and it will come out easily. Once the propeller is removed, take a Phillips screwdriver and remove a couple of screws that contain the gear bases.
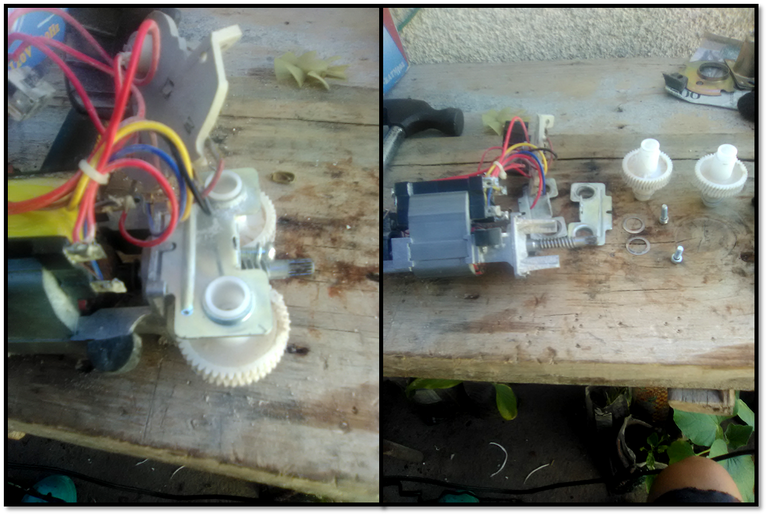
Efectuada la operación de retirar los engranajes, se las entrego al dueño para que realice la respectiva compra. Después de dos días de esperar por los repuestos, al fin llegaron y me encuentro con la particularidad de que el dueño compro los engranajes genéricos,
se nota por la calidad de los mismo y por su puesto el precio,
estos cuestan menos (18 bolivares el par aproximadamente) pero los originales marca oster son mas caros (10 dolares el par), entonces por buscar una economía comprometes la durabilidad de los mismo, por tal motivo le participo al dueño del equipo, que las piezas solo duraran un aproximado de 5 a 10 batidas, esto es por la experiencia con este tipo de repuesto.After the operation of removing the gears, I give them to the owner to make the respective purchase. After two days of waiting for the spare parts, they finally arrived and I find the particularity that the owner bought the generic gears,
it is noted by the quality of the same and of course the price
, these cost less (18 bolivares per pair approximately) but the original oster brand are more expensive (10 dollars per pair), then by looking for an economy you compromise the durability of the same, for such reason I participate to the owner of the equipment, that the pieces will only last an approximate of 5 to 10 beats, this is for the experience with this type of spare part.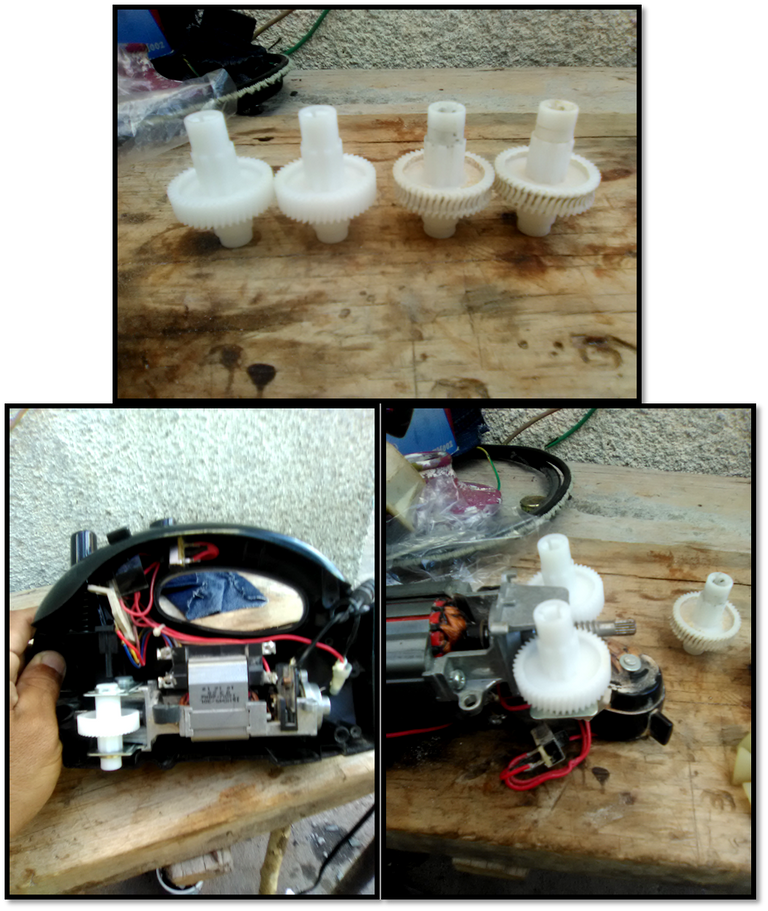
Luego de colocar los engranajes comienzo a armar el aparato, y por estar apurado se me olvido colocar la hélice, pueden observarlo en la fotografía inferior izquierda, así que tuve que desarmar colocar la hélice y volver armar, otra vez, por eso recomiendo no apurarse cuando estén realizando cualquier reparación y sobre todo tener mucha paciencia.
After placing the gears I start to assemble the device, and because I was in a hurry I forgot to place the propeller, you can see it in the lower left picture, so I had to disassemble, place the propeller and reassemble, again, so I recommend not to hurry when you are doing any repair and above all to have a lot of patience.
Todas las imágenes son de mi propiedad y de uso exclusivo para hive motors, el traductor utilizado fue Translated with www.DeepL.com/Translator (free version)
All images are my property and for the exclusive use of hive motors, the translator used was Translated with www.DeepL.com/Translator (free version)
Este es el final de este post, espero sea de su agrado, si tienen algún consejo o critica constructiva déjemelo saber a través de caja de los comentarios, sin mas que agregar me despido hasta la próxima publicación.
This is the end of this post, I hope you like it, if you have any advice or constructive criticism let me know through the comments box, without more to add I say goodbye until the next publication.
0
0
0.000
Congratulations @los2franes! You have completed the following achievement on the Hive blockchain and have been rewarded with new badge(s):
Your next target is to reach 50 posts.
You can view your badges on your board and compare yourself to others in the Ranking
If you no longer want to receive notifications, reply to this comment with the word
STOPTo support your work, I also upvoted your post!
Check out the last post from @hivebuzz:
Support the HiveBuzz project. Vote for our proposal!