DIY: Turning Recycled Bottle Lids Into Stylish Bags

Hello everyone. I hope you’re all doing well and enjoying the weather wherever you are. Welcome to my blog. It is so nice to finally discover a community where I can share my creative ideas. I’ve been reading posts from this community, but I’ve just been too lazy to subscribe and share one of my creative ideas. Plus, I’ve not had the time and resources to spare. I read through posts from other users and I found out that there are so many talented souls in this community. Now, I’m motivated to share my work, and I know by doing so, I’ll also develop my creative skills.
Two months ago, my little friend celebrated her birthday. I was not there to witness the celebration because I was in school, attending lectures and racking my brain in exam halls. I wanted to make my presence felt, so I sent her money. I wanted to do more for her, so I promised her that when I came home we’d do something nice together. So, yesterday, we came up with an idea to do something cool. It took about 2 hours of our time. Although it was stressful, I had fun doing it. It brought back childhood memories.


The only material that is needed to make this bag is a seal or lid that lies below recycled bottle caps ( That's the round thing that covers recycled bottles.) If you notice, there’s this round secular seal or disc that sits beneath the lid. It is used to prevent leakage and to provide extra protection to the content in the bottle. It is amazing how this stuff can be used to create different things. The number of lids you need depends on how big you want your bag to be. For this bag, I used more than 700 lids.
I didn't have time to search for this stuff, so I just bought it at the market. I bought 800 lids for #200 (about $0.36) quite cheap, yeah?
By rest assured that you can easily make this bag. It is really simple if you know how to do the steps. The beginning part is the most important.
Step 1


To make the bag colorful, it is advisable to make use of different colors. We don't want to mix everything together, so separate the lids according to colors to make things convenient. It was quite easy to separate them because my little friend was there to help.
Step 2


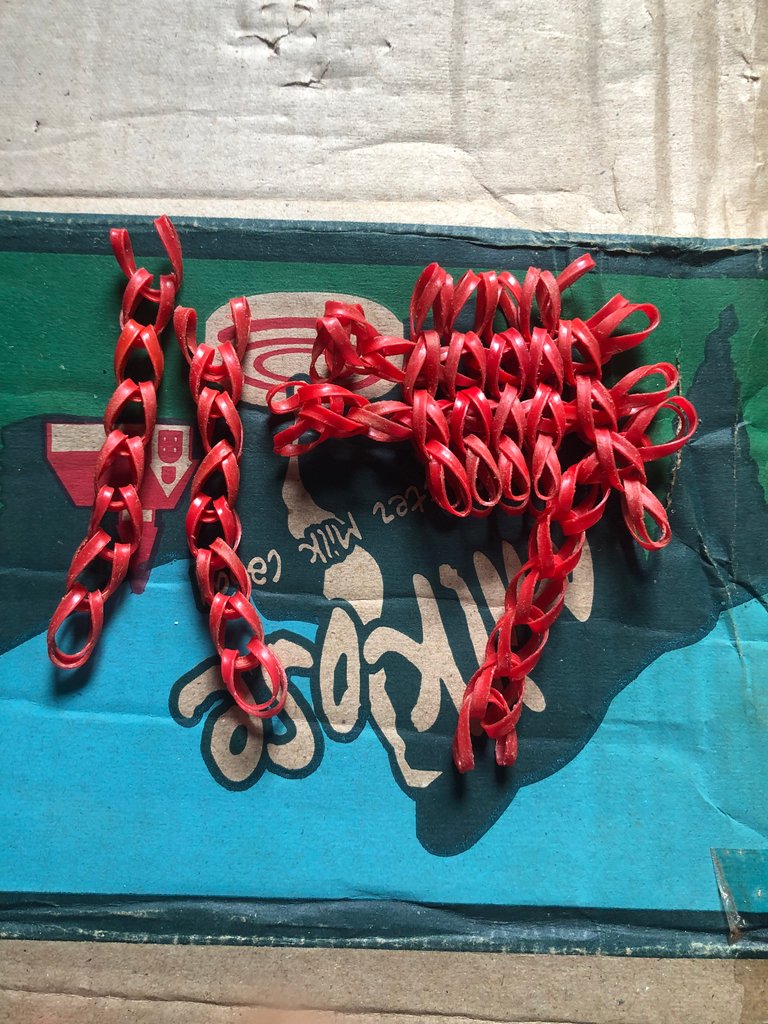
This is where the work starts. Bend the lid till he forms a C-shape. The image below clearly explains what you have to do. Bend another lid and fix it into the previous lid. Keep fixing the kids into each other till you get your desired length. Note that, the longer and wider the lids get, the bigger the bag.
Step 4


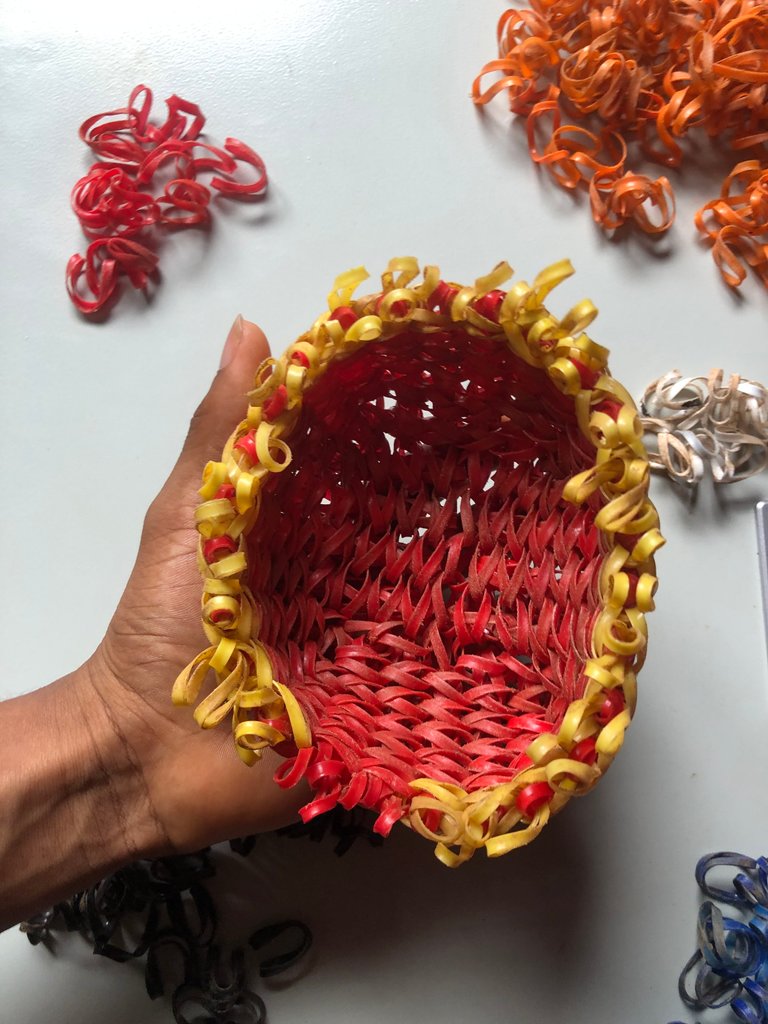
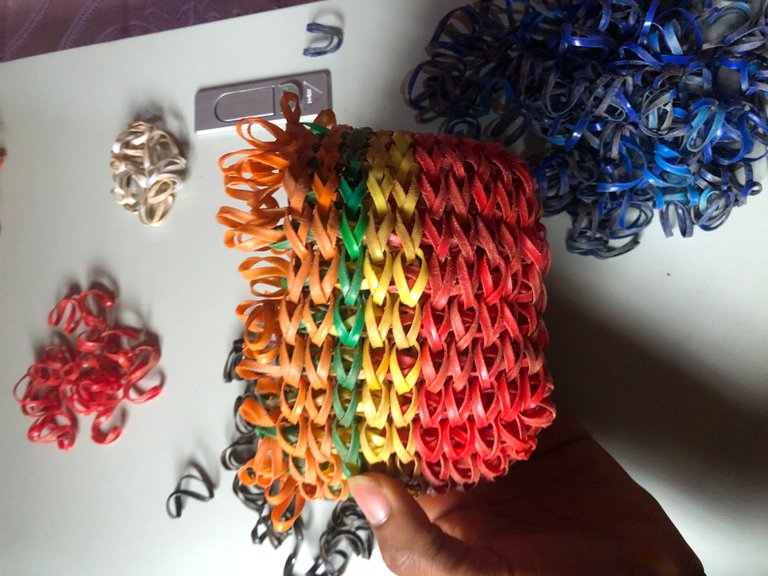
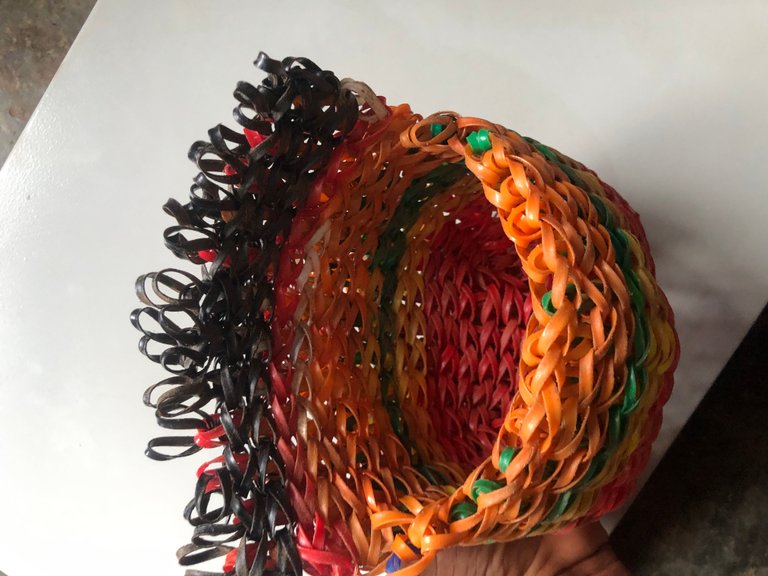
After you must have gotten your desired length and width. Start fixing the lid to form a bag. To make it colorful, you can mix the colors. Keep adding the lids till you get your desired shape.
Step 5


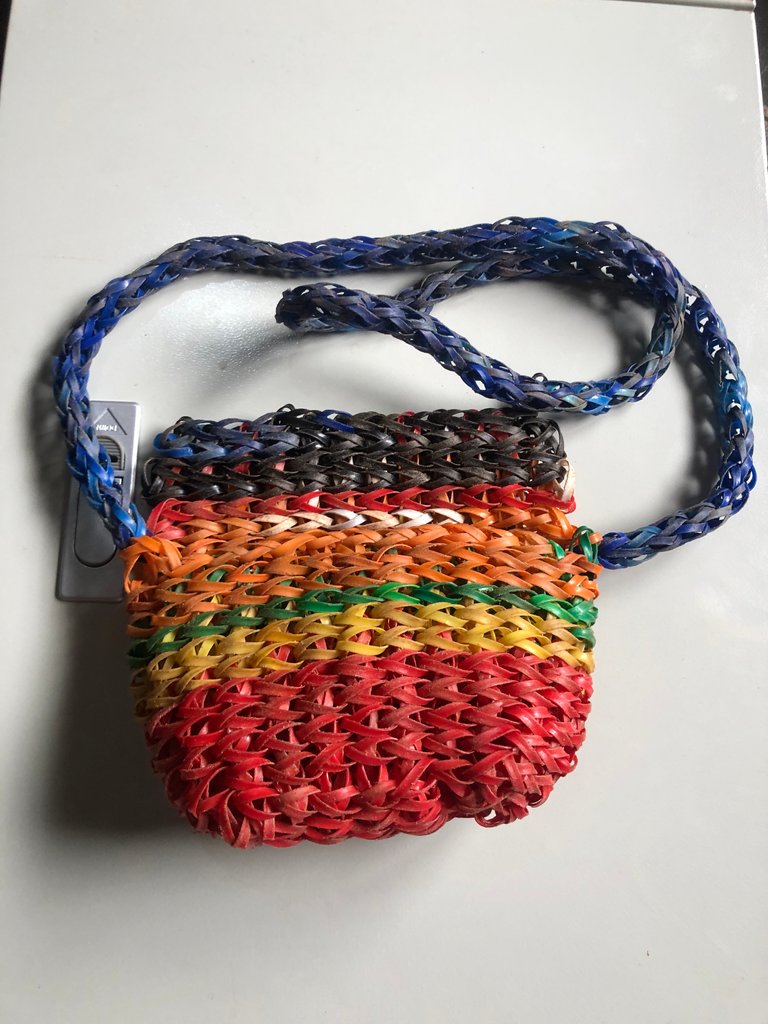
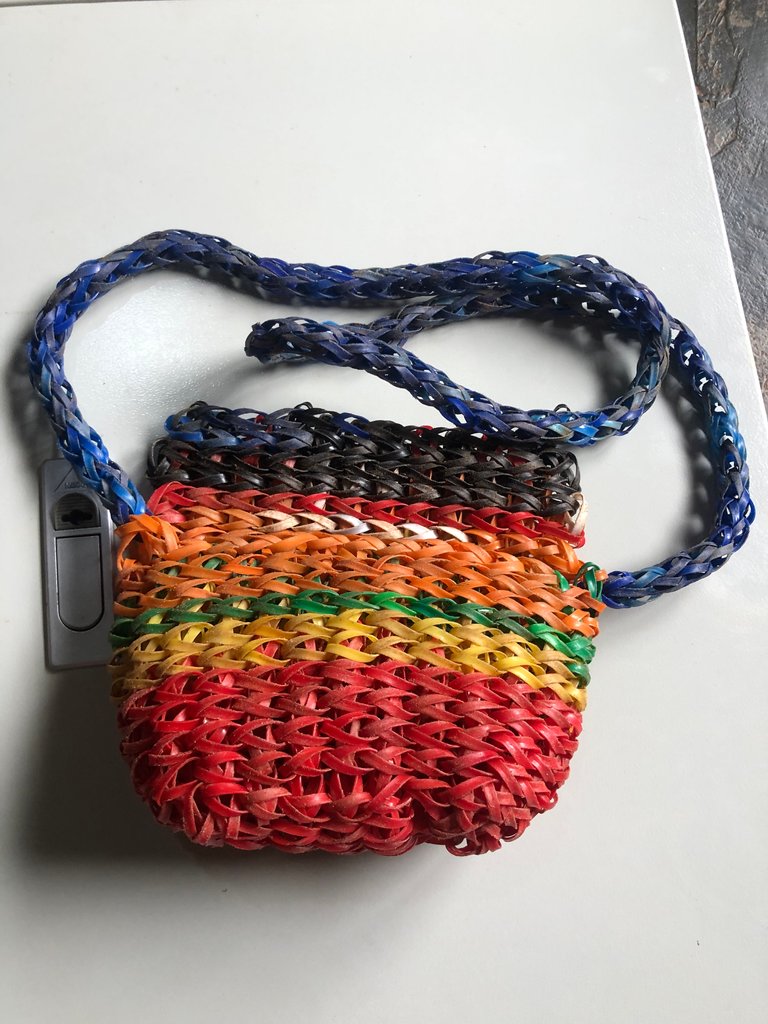
The last step is to make the handle. I decided to use blue lids to make the handle. I think this is the easiest part. You don't have to do anything special. Just fix the lids into each other and add it to the bag after you must have gotten your desired length.
That's all. Quite simple, right? I handed it over to her and it brought a huge smile on her face.
NOTE: The first image was taken by me and designed with Canva.
All images in this post are mine.
Incredible work bud
!diy
Thank you so much.
The bag is so nice. Amazing and thorough work.
You can query your personal balance by
!DIYSTATSWow, its so amazing
You are so creative, JustFavour...
I am impressed 😎
Oh wow! Thank you so much, Uncle. Hehe. I did the little I know.
It is amazing!
Really nice work brother.
Appreciated.
Congrats your post has been curated by ahmedhayat with a 100%.😂😂
Hehe. Thank you for your vote, sir.😂
😂😂
This post has been manually curated by @bhattg from Indiaunited community. Join us on our Discord Server.
Do you know that you can earn a passive income by delegating to @indiaunited. We share more than 100 % of the curation rewards with the delegators in the form of IUC tokens. HP delegators and IUC token holders also get upto 20% additional vote weight.
Here are some handy links for delegations: 100HP, 250HP, 500HP, 1000HP.
100% of the rewards from this comment goes to the curator for their manual curation efforts. Please encourage the curator @bhattg by upvoting this comment and support the community by voting the posts made by @indiaunited.
Whaoooo beautiful and creative idea
Thank you.
Impressive work. Reviewed and Approved for an Ecency boost. Keep up the good work.

Thank you.
Most Welcome.
Yay! 🤗
Your content has been boosted with Ecency Points, by @justfavour.
Use Ecency daily to boost your growth on platform!
Support Ecency
Vote for new Proposal
Delegate HP and earn more
If I didn't see the tutorial I would have never imagined that you made this colorful and cute bag with rubber bands. I loved it, it is very original, different, practical. Thanks for sharing so much creativity. Greetings 🤗
Greetings, friend.
I'm really proud of myself. I actually had doubts before I started, but it turned out to be nice.
Hard work that cannot go unnoticed. I love the different ways that we can turn waste materials into new objects and give it another life. I congratulate you, a good way to promote recycling.
Hello there, @linita
I'm glad you noticed my efforts.
Thanks so much for stopping by.
Nice to admire your work. Greetings.
Beautiful result, so creative!😄