Battle Mage Secrets: You shall pay the Price of the Taunt!
Welcome to another Battle Mage Challenge, after a forgotten week where no posts have been made and no grinding was made on my splinterlands account, here I am back with an interesting battle that would be showcasted in a few minutes but before that:
Fury

All units have the Fury ability.
Double Damage against a Taunt Monster
Think carefully before including a unit with Taunt

These monsters shown ahead, are mainly part of many strong and resilient strategies that are based on both controlled aggression and solid defense.
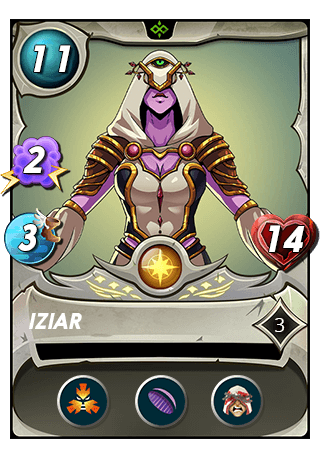
The lone exception would be Iziar, given its second ability Martyr, we want this monster to be slain in order to benefit adjacent monsters from the Martyr Ability!
Without further ado, let's get started:


- Mid Mana Cap 37 Mana
- All Elements availalble except Dragon
Opportunity&FuryRulesets
I have decided with this unusual team on my own:
Summoner
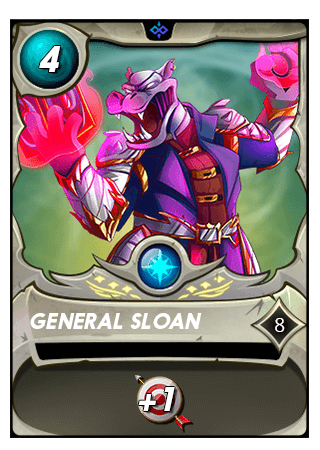
Ability: +1 Ranged Damage
Since Sloan is my only High leveled Life Summoner, and while I'm using a carry ranged monster in addition to a number on Life Monsters that will be detailed below
1st Position
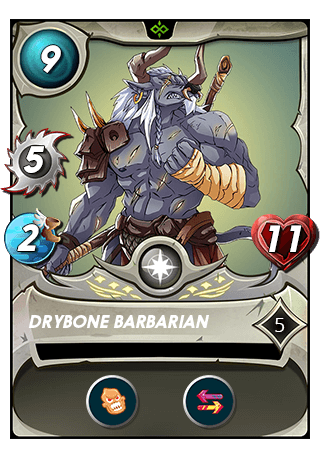
Ability: Enrage + Retaliate
Finally I've upgraded this bad boy into the 5th level and unlock a very interesting ability: Retaliate, coupled with Enrage, the Counter-Attack promises to be deadly if the opponent isn't protected by its Armor! Well hope I'm facing a Taunt Monster the witness the insane damage!
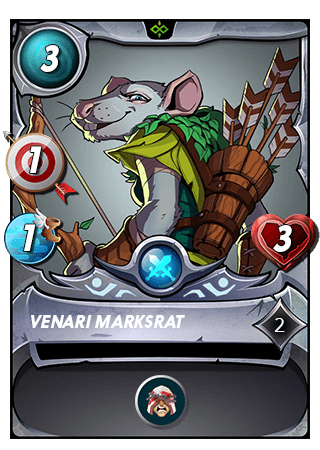
2nd Position

Ability: Strenghten + Triage
Using at as a support card since the opportunity attacks will most certainly hit my backline! On the other side, a 4 Magic Damage attack should NOT be neglected as it can one shot an opponent!
+1 Health for the entire team proves to be useful.
3rd Position
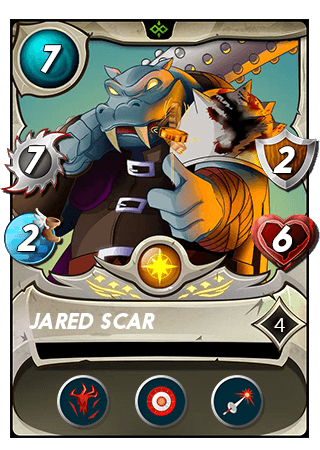
Ability: Bloodlust + Aim True + Pierce
This monster is a GO-TO in opportunity Ruleset as it got everything it needs:
- Piercing followed by a 7 Melee Damage that can easily takedown the squichiest Monster in a single shot
- Aim True: Even the most evasive monsters can't escape the blade of the Jared Scar
- Bloodlust would allow for an incontrollable snowball effet the longer the battle goes the stronger it gets!
4th Position
Ability: Martyr
Always make sure to the Martyr Ability if the board allows as its the most vulnerable to Opportunity attacks leading to buffing the desired monsters easily, in this case Jared Scar & Pelacor Arbalest, further amplifying their damage output.
5th Position
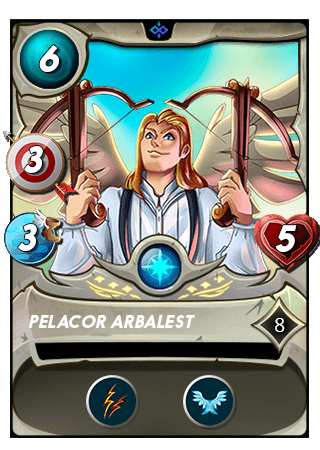
Ability: Double Strike + Flying
His Damage is buffed by the Slean +1 Ranged buff and further amplified by the Martyr Ability to push its damage 5 Ranged Double Strike while having the weakest opponent as a target!
Here's the Link to The Battle
Pre Round 1
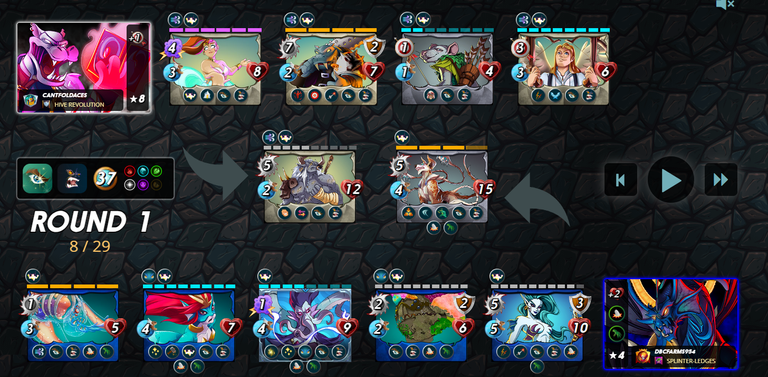
A pretty solid team onboard but the question is why did the enemy go for a Taunt Carry monster since its covered by a couple of support cards. Lucky him he has a almost maxxed Coastal Sentry.
Round 1
- Well one of the worst starts I could have, while Venari Marksrat got taken down, Coastal Sentry go its Double Strike hit my Pelacor Arbalest and got itself a Double Kill
- Drybone Barbarian gets enraged, Retaliate on the Fiend to one-shot it!
- Djinn Renova atack dealt a 8 Magic Attack since the Ferocity Doubles the Damage on Taunt Monsters
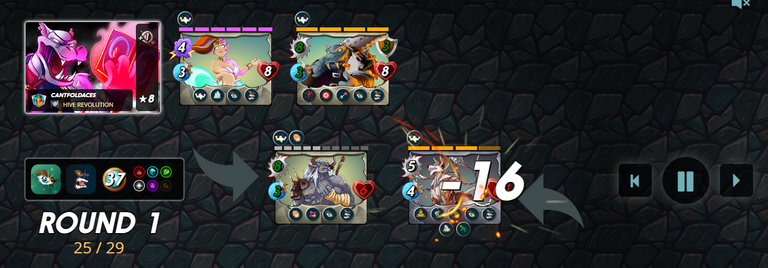
- You love to see it! Jared Scar with 8 Damage, adding to the Ferocity Damage, fires a 16 DAMAGE and takes down the Coeurl Lurker!
- First Bloodlust and ramps its attack to 9
Round 2
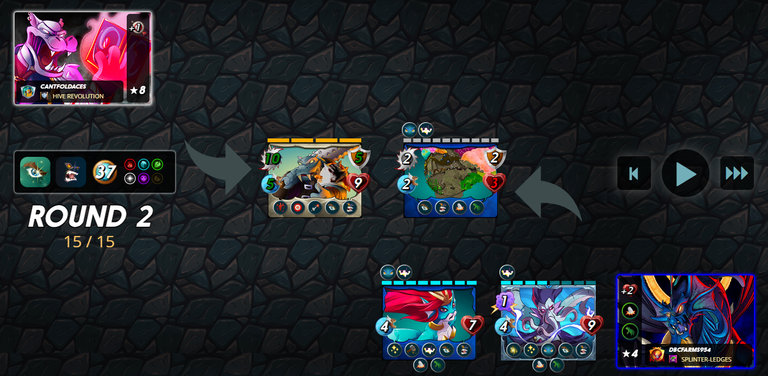
- Starting with Coastal Sentry, gets Retaliated by the Drybone, only left with a Couple of Health Points,
- Second Strike takes down the Drybone, no chances for a second retaliate, Trample into Djinn Renova
- Jared Scar takes the Revenge on the Barbarian sacrifice, takes down the enemy carry: 2nd Bloodlust proc
- A wild Hardy Stonefish surprisingly taking down the Djinn Renova, leaving Jared Scar VS 3!
Round 3+4
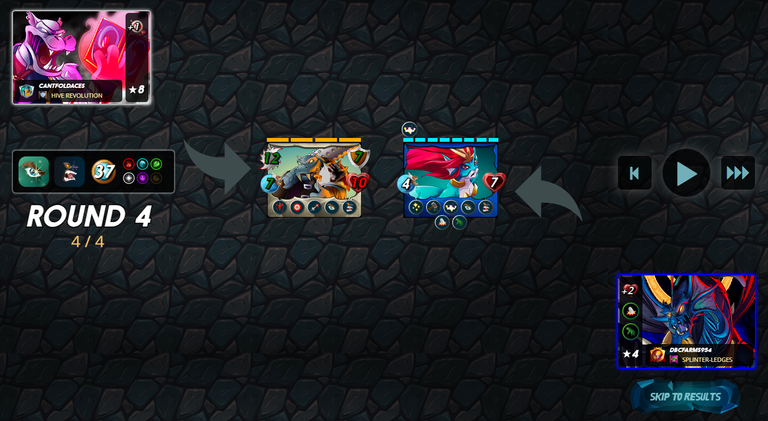
- Jared Scar takes down the Hardy Stonefish and Anasth in Back to back Rounds bumping up its Melee Damage to 12 & 7 Speed
- Leaving a lonely scared Merdaali alone against that insane snowballing JARED!
Round 5 & End
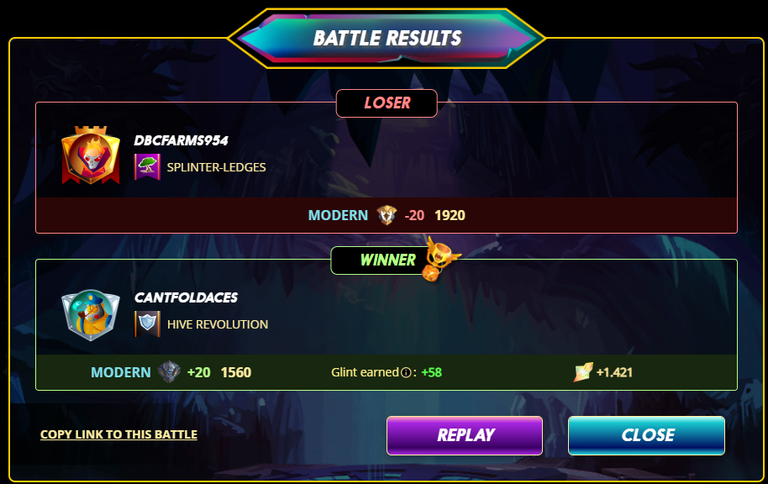
A single shot was needed to seal the VICTORY and get rewarded with 1.42 SPS & 58 Glint that I'm accumulating to increase my Soulbound collection!
Here's the Link to The Battle
After Battle Commentary
- Jared Scar is INSANE if played correctly in
Eqaul Opportunity - Moreover, we got lucky our opponent played a Taunt Monster and got to witness the insane damage that my monsters can fire!
- Notice that Lookout decrease the damage against all monsters (even on 1st position) since their attacks are considered as opportunity
Thank you for reading till now and Good luck Have Fun on your Splinterlands Battles!
Make sure to take part in the Weekly battle Mage Secret here
Wanna take part in these exciting Splinterlands battles: Join me here
!hiqvote
@cantfoldaces, the HiQ Smart Bot has recognized your request (1/1) and will start the voting trail.
In addition, @cantfoldaces gets !PIZZA from @hiq.redaktion.
For further questions, check out https://hiq-hive.com or join our Discord. And don't forget to vote HiQs fucking Witness! 😻
Delegate Tokens and HP to Fallen Angels to earn weekly rewards!
Delegate | Join to the guild
[@PowerPaul:] Buddy! Thank you for your support of the @cryptocompany (please check out for updates on the actual domain problems!) voting service & Hive a great day!
lolztoken.com
I've lost three days already.
Credit: gillianpearce
@cantfoldaces, I sent you an $LOLZ on behalf of ccceo.voter
(3/6)
Delegate Hive Tokens to Farm $LOLZ and earn 110% Rewards. Learn more.
Are you looking for Tier 5 brawl guild? THE GUILD OF NEOXIAN looking for wild silver fray player. If you are good in that fray and interested to join then contact with our Guild Officer
xawi& Also Don't Forgot to Checkout our BDVoter Daily Hive Showcase & Participate into our Daily giveaway to win various prize.Thanks for sharing! - @alokkumar121
