| CREAZIONE APPLICAZIONE CALCOLATRICE |pt.1
Bentornati a tutti, oggi inizieremo un nuovo progetto, attraverso Android studio realizzeremo una vera applicazione che simula una calcolatrice che potrete scaricare e utilizzare!
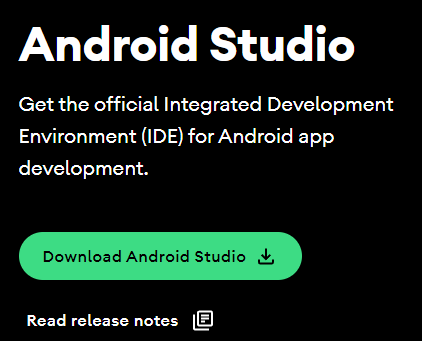
per scaricare Android studio potete usare questo link https://developer.android.com/studio.
Procediamo senza perdere tempo.
Dividerò il progetto in due parti, nella prima ovvero questa andremo a creare tutta la parte grafica per il nostro progetto, mentre se ovviamente il post vi piace, creerò tutta la parte programmata.
Per prima cosa bisogna sapere cos'è android studio, Android studio non è altro che un programmatore che ci consente di creare giochi basati sul sistema operativo android, utilizza come linguaggi come ad esempio java, il suo vantaggio è il dinamismo, ovvero il fatto che è facilmente capibile e accessibile a tutti.
Come prima cosa apriamo Android studio e creiamo un nuovo progetto, vi si creeranno dei file, uno chiamato "activityMain" e un altro "mainActivity",è li che andremo ad agire.
Nell'activityMain noi andremo a inserire tutta la parte grafica della applicazione, quindi bottoni,testi,immagini e tutto il resto,mentre nell mainActivity tutta la parte della programmazione, per il perfetto funzionamento del nostro progetto.
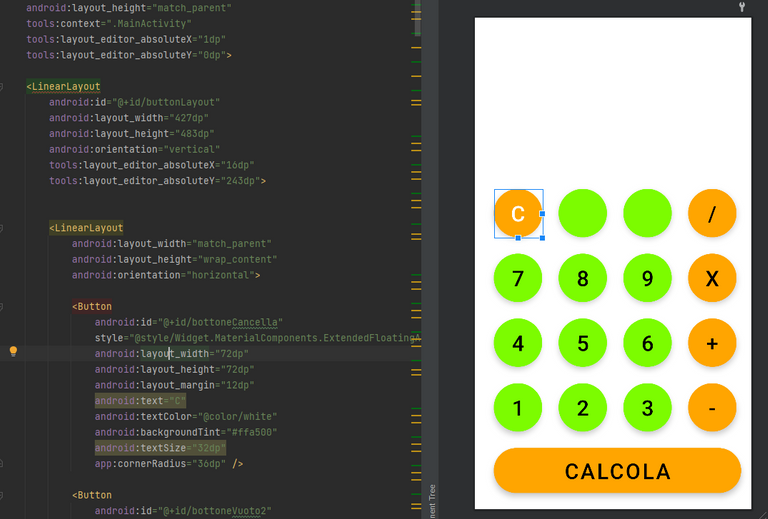
Per prima cosa ci dirigiamo nell Activity main e iniziamo a creare la parte grafica,per la creazione della calcolatrice ho deciso di inserire i tasti dei numeri,quelle delle varie operazioni e un tasto cancella.
Andiamo in alto a sinistra e ci dirigiamo su "split", qui inizieremo la nostra programmazione.
Digitiamo il comando <<LinearLayout per creare appunto un campo lineare nella quale aggiungeremo i nostri bottoni,dopo fatto questo inseriamo un botton che andremo a programmare.
       <Button
            android:id="@+id/bottoneCancella"
            style="@style/Widget.MaterialComponents.ExtendedFloatingActionButton"
            android:layout_width="72dp"
            android:layout_height="72dp"
            android:layout_margin="12dp"
            android:text="C"
            android:textColor="@color/white"
            android:backgroundTint="#ffa500"
            android:textSize="32dp"
            app:cornerRadius="36dp" />
Questo è il comando per la creazione di un bottone:
all'interno del nostro bottone abbiamo molti attribbuti:
-come prima cosa lo stile del nostro bottone quindi se deve essere rotondo,triangolare o di altri tipi,
-dopo di che abbiamo inserito l'altezza e la larghezza del nostro bottone(sotto forma di dp)
- Una cosa fondamentale da aggiungere è il testo, che non sarebbe altro che il contenuto del nostro bottone
-Inseriamo il colore del testo seguito dalla grandezza e il colore del nostro bottone, In questo modo abbiamo creato il nostro bottone.
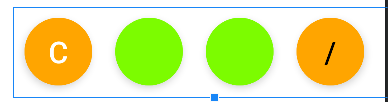
Copiamo il bottone appena creato e lo copiamo altre 3 volte, in modo da avere una serie di 4 bottoni in fila con le giuste distanze fra di loro.
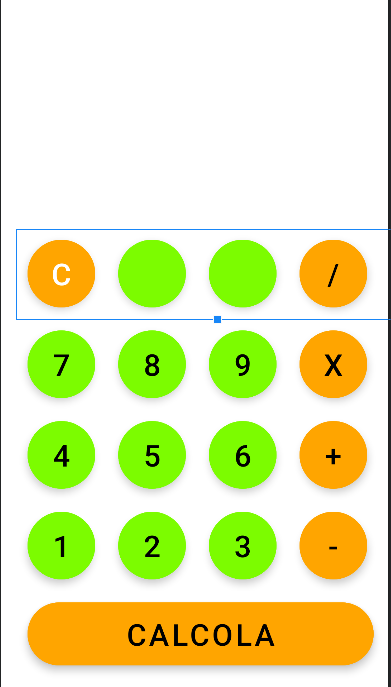
Dopo aver fatto fatto ciò, chiudiamo il tag aperto del layout, e copiamo l'intero contenuto, compreso i bottoni che andremo a incollare come fatto con i bottoni, in modo tale avremo creato tutti i bottoni necessari.
COSA MOLTO IMPORTANTE
Ogni bottone è formato da ud che ci serve per richiamare e utilizzare il file, Quindi dopo aver incollato i bottoni bisogna cambiargli l'id e ovviamente il loro contenuto altrimenti il bottone non verrà letto, ogni bottone deve avere un id diverso, altrimenti vi darà il seguente messaggio di errore:
IL BOTTONE CHE HAI INSERITO E' GIA' ESISTENTE
Nella seconda parte andremo a programmare tutte le funzioni della nostra applicazione, a dare un valore ai bottoni e ad assegnare a loro le funzioni...
Welcome back everyone, today we will start a new project, through Android studio we will make a real application that simulates a calculator that you can download and use!
to download Android studio you can use this link https://developer.android.com/studio.
Let's proceed without wasting time.
I will divide the project into two parts, in the first one that is this one we are going to create all the graphic part for our project, while if you obviously like the post, I will create all the programmed part.
First we need to know what android studio is, android studio is nothing but a programmer that allows us to create games based on the android operating system, it uses as languages such as java, its advantage is the dynamism, that is the fact that it is easily understandable and accessible to everyone.
As first thing we open Android studio and create a new project, there will be created files, one called "activityMain" and another "mainActivity",that's where we are going to act.
In the activityMain we are going to insert all the graphical part of the application, so buttons,texts,images and everything else,while in the mainActivity all the programming part, for the perfect functioning of our project.
First we head into the mainActivity and start creating the graphical part,for the creation of the calculator I decided to insert the buttons of the numbers,those of the various operations and a delete button.
We go to the top left and head to "split",here we will start our programming.
We type the command <<LinearLayout to create precisely a linear field in which we will add our buttons,after this is done we insert a button that we are going to program.
       <Button
            android:id="@+id/buttonDelete"
            style="@style/Widget.MaterialComponents.ExtendedFloatingActionButton"
            android:layout_width="72dp"
            android:layout_height="72dp"
            android:layout_margin="12dp"
            android:text="C"
            android:textColor="@color/white"
            android:backgroundTint="#ffa500"
            android:textSize="32dp"
            app:cornerRadius="36dp" />
This is the command for creating a button:
inside our button we have many attribbuti:
-first the style of our button so if it should be round,triangular or other type,
-after that we entered the height and width of our button(in the form of dp)
- One key thing to add is the text, which would be nothing but the contents of our button
-We enter the text color followed by the size and color of our button, In this way we have created our button.
We copy the button we just created and copy it 3 more times, so that we have a set of 4 buttons in a row with the correct distances between them.
After we have done that, we close the open layout tag, and copy the entire contents, including the buttons that we are going to paste as we did with the buttons, so that we will have created all the buttons we need.
VERY IMPORTANT THING
Each button consists of ud that we need to call and use the file, So after pasting the buttons we need to change their id and obviously their content otherwise the button will not be read, each button must have a different id, otherwise it will give you the following error message:
THE BUTTON YOU ENTERED IS ALREADY EXISTING
In the second part we are going to program all the functions of our application, give a value to the buttons and assign functions to them...
@tipu curate
Upvoted 👌 (Mana: 15/45) Liquid rewards.
grazie mille!!