STEP BY STEP GUIDE ON HOW I MADE A COMFY OFFICE GOWN FOR A CUSTOMER THAT FITS PERFECTLY
Hey lovelies ❤️
It's your favorite girl @debbie-ese 😍
Welcome to my blog 🤗
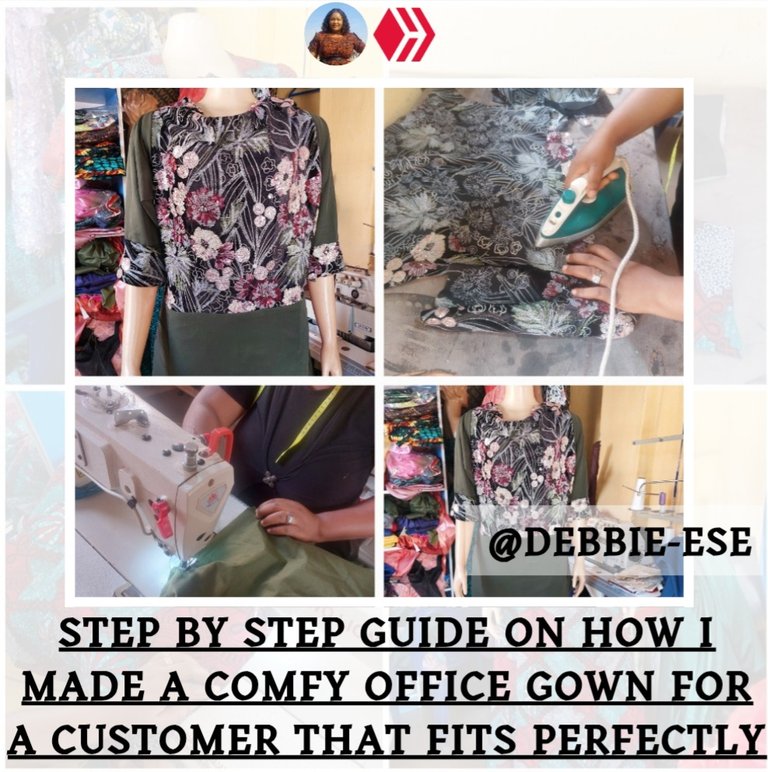
In this post I will be sharing with you a gown that I made for a customer. It is very rewarding as a fashion designer to recreate your customer's order and get a thumbs up when the work is delivered. This gown was made for a working-class woman who needed an outfit that is comfy for the office. She came to my shop with her fabrics and a reference style on her phone that she want to recreate. While we got talking she made me know that she was referred by a satisfied customer whom I had made some dresses for in the past. I had enough time to work on her fabrics and delivered promptly as their was no rush on the delivery schedule.
Materials Used
- 1 yard lace-like fabrics
- 1½ yard crepe fabrics
- Zipper
- Matching threads
- Tailoring chalk
Step by Step
These are the measurements that are used for this gown - shoulder (14"), bust (34"), underbust (31"), half length (17"), gown length (55"), sleeve length (16"), round sleeve (12").

Start by drafting the basic bodice on the lace-like fabrics using the measurements above, add zipper allowance to create room for the zipper and draft a straight skirt pattern on the crepe fabrics using the waist, hip and full gown length measurements.

Next, draft out the sleeves. It is a combination of both the lace-like and crepe fabrics.


- Next, cut out the front and back pieces of the bodice from the lace fabric and also cut the plain crepe fabrics for the skirt part.

- Then cut out the sleeves with the lace fabrics for the upper part and lower sleeve from the plain crepe fabrics.

- Next, at the shoulders and sides sew the lace pieces together and press all the seams with your pressing iron.

- Then join the pieces (lace and crepe) of the sleeves together and attach to the bodice using the round sleeve measurements.


- Also, be sure that it fits perfectly around the armhole area without it wrinkly.


Next, join the skirt front and back pieces. Then join the skirt to the bodice at the half length (17").

The waist line must align properly so that it won't be too obvious that it was joined together.

Next attach the zipper and give the gown a good final press.

To check for the fitting wear the gown on your mannequin and make necessary adjustments if needed.
Thanks for reading and see you in my next one.
ABOUT ME


Just a quick reminder:
The text and photos on this blog was created by me, unless I state otherwise.
The cover images are designed using Canva with strict adherence to elements that are licenced for use under their terms.
Photographs are taken with my Samsung Galaxy A52 - 64MP Camera and other amazing features that absolutely capture the moment in high quality.
Lastly, do not use any of my content either text or image without asking me for authorisation. In other words, unauthorised used of my content is highly prohibited.
Sending you some Ecency curation votes!
WOW! It is fashionable, elegant, and stylish. It looks stunning. It can grab others attention. Well done!
selected by @rezoanulvibes
Wow that's awesome.This steps you have listed are well explained. Hopefully someone can follow it and gets the same results as you