Easy step by step process on how to make an Artistic Hive-based design using only your phone 📱
Hello Hivers
So today I decidedly to share how easy it is or rather how easy it can be to make or create an Alien art Hive design using nothing but your phone, nothing more is needed. Everything was done on my phone and of course with a little bit of patience.
I will be giving you a step-by-step breakdown on the process and a video will also be made available here in this post via 3s Speak just in case you want a video-based breakdown for this
After going through the breakdown you should be able to make yours. Make yours and share in the comment section, let see your beautiful designs
Now to the process 👇
What you would be needing:
An Android phone (obviously) because that what I used
Pixellab application version 2.1.1 which you can download on google playstore ( I think its about 17MB in size ). Just sesrch for an app with the big "P" logo in a blue background.
A bit of patience to create stunning design because as easy and simple as this would be made to be, it still requires deliberate effort on your path

Transparent (png) version
Black Background version
Transparent Version without Hive logo

Background Version without Hive logo
Now lets breakdown how you can do these designs in a step-by-step process. The animation aspect will be broken down in a completely different post
A video-based step-by-step breakdown to make it easier
Step 1
First thing first, open your pixellab app, don't forget we are totally doing this on our phone, so open pixel lab on your phone 👇

Step 2
Once opened, change the background to the bluish black color made available
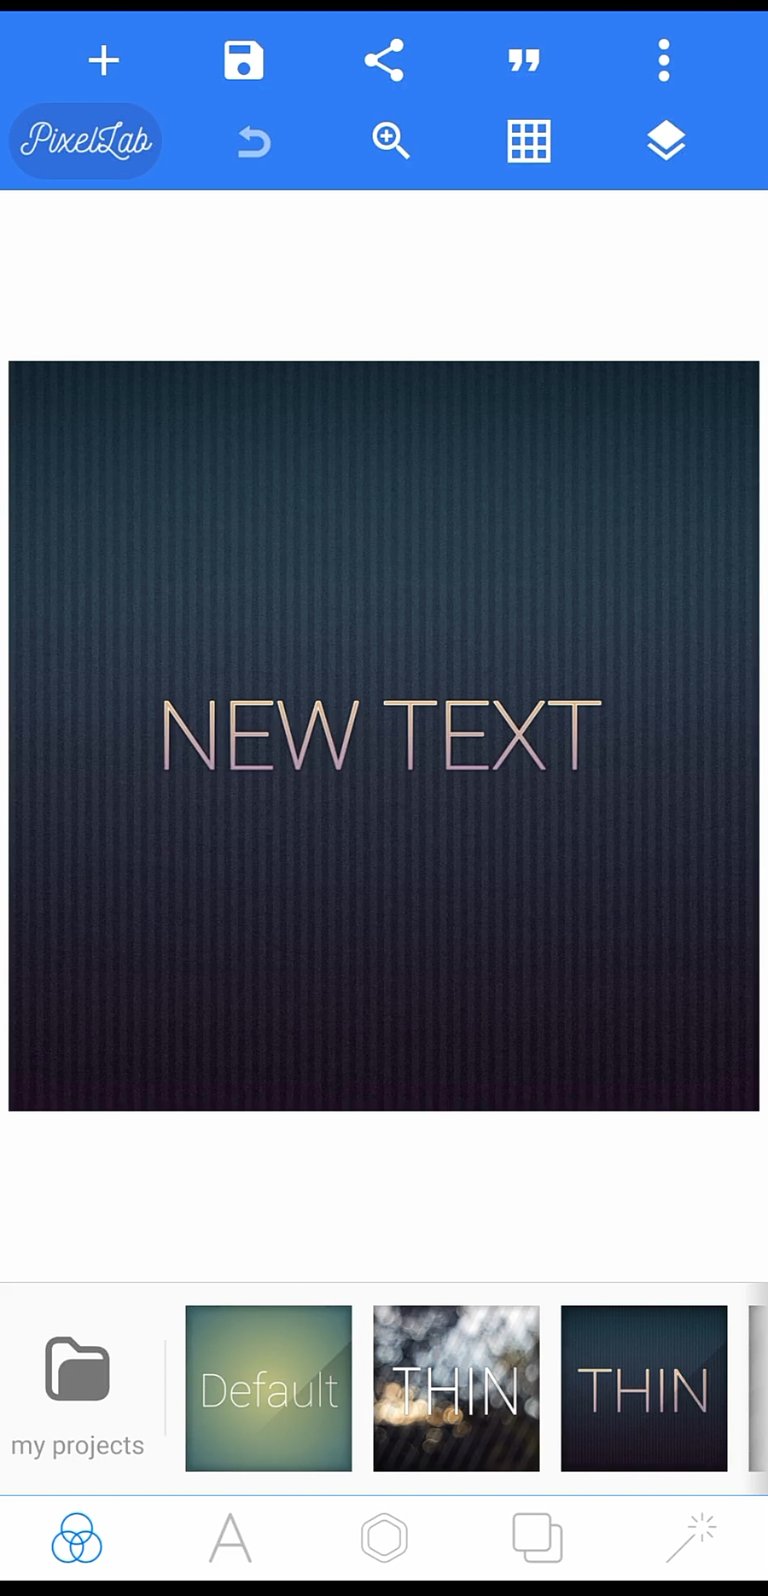
Step 3
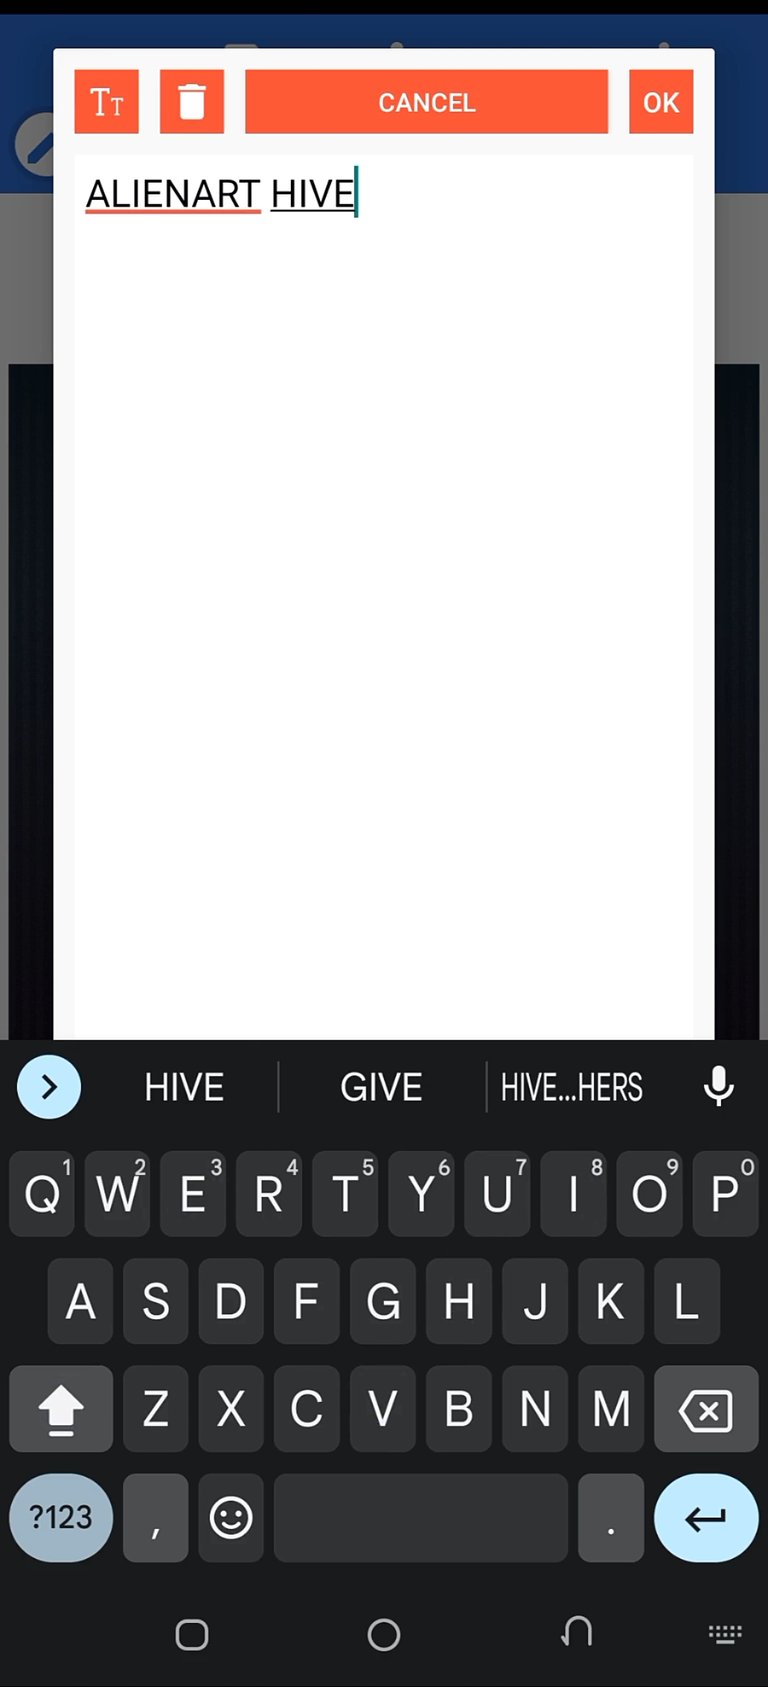
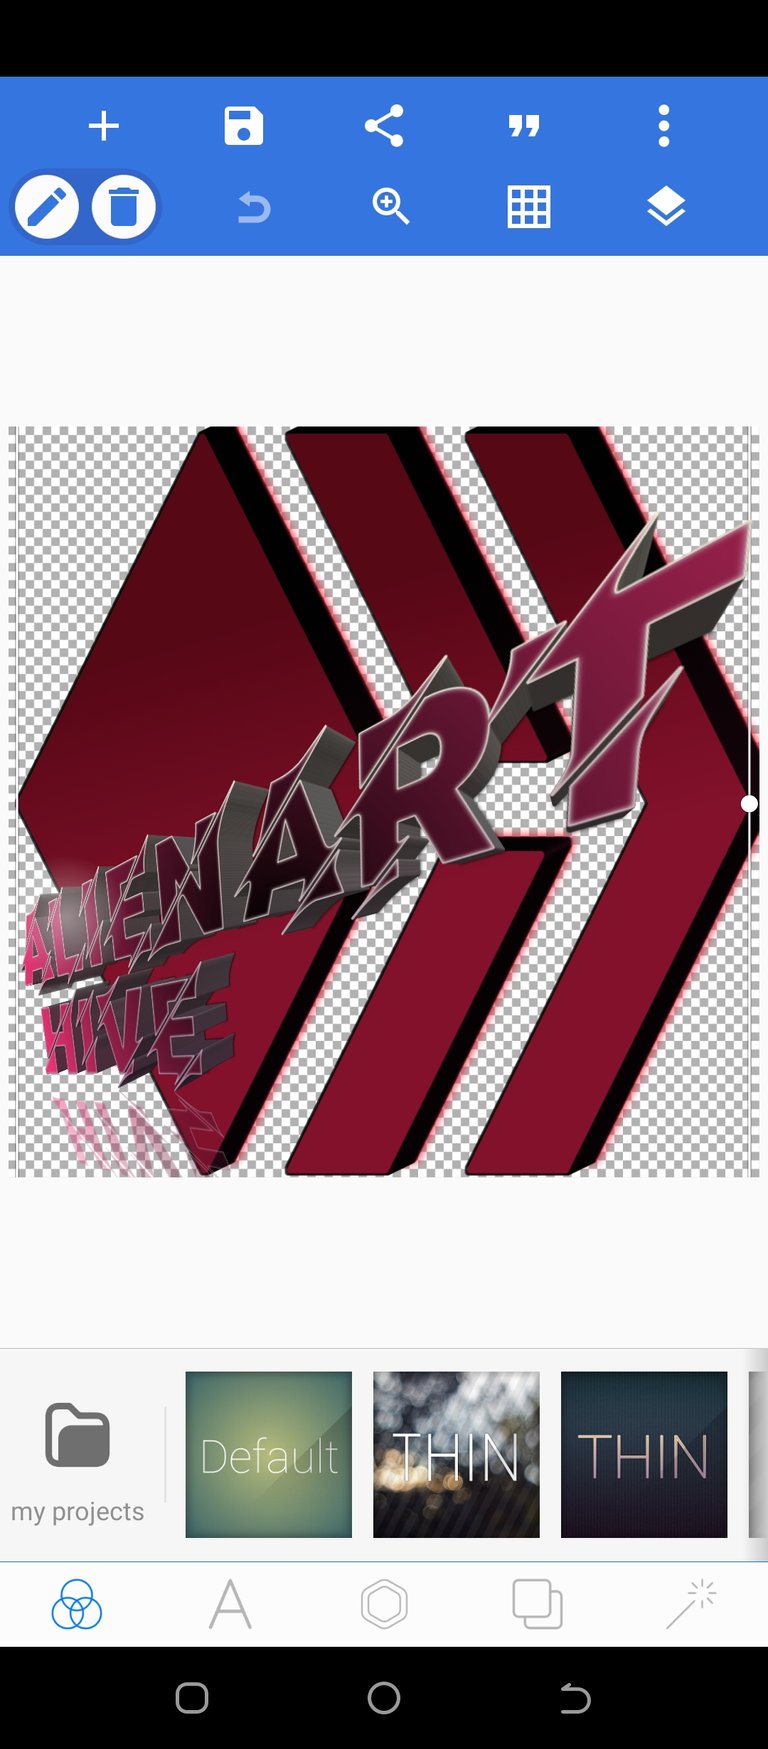
Double tap on select text to change the text to whatever you like, in this case we used "ALIENART HIVE"
Step 4
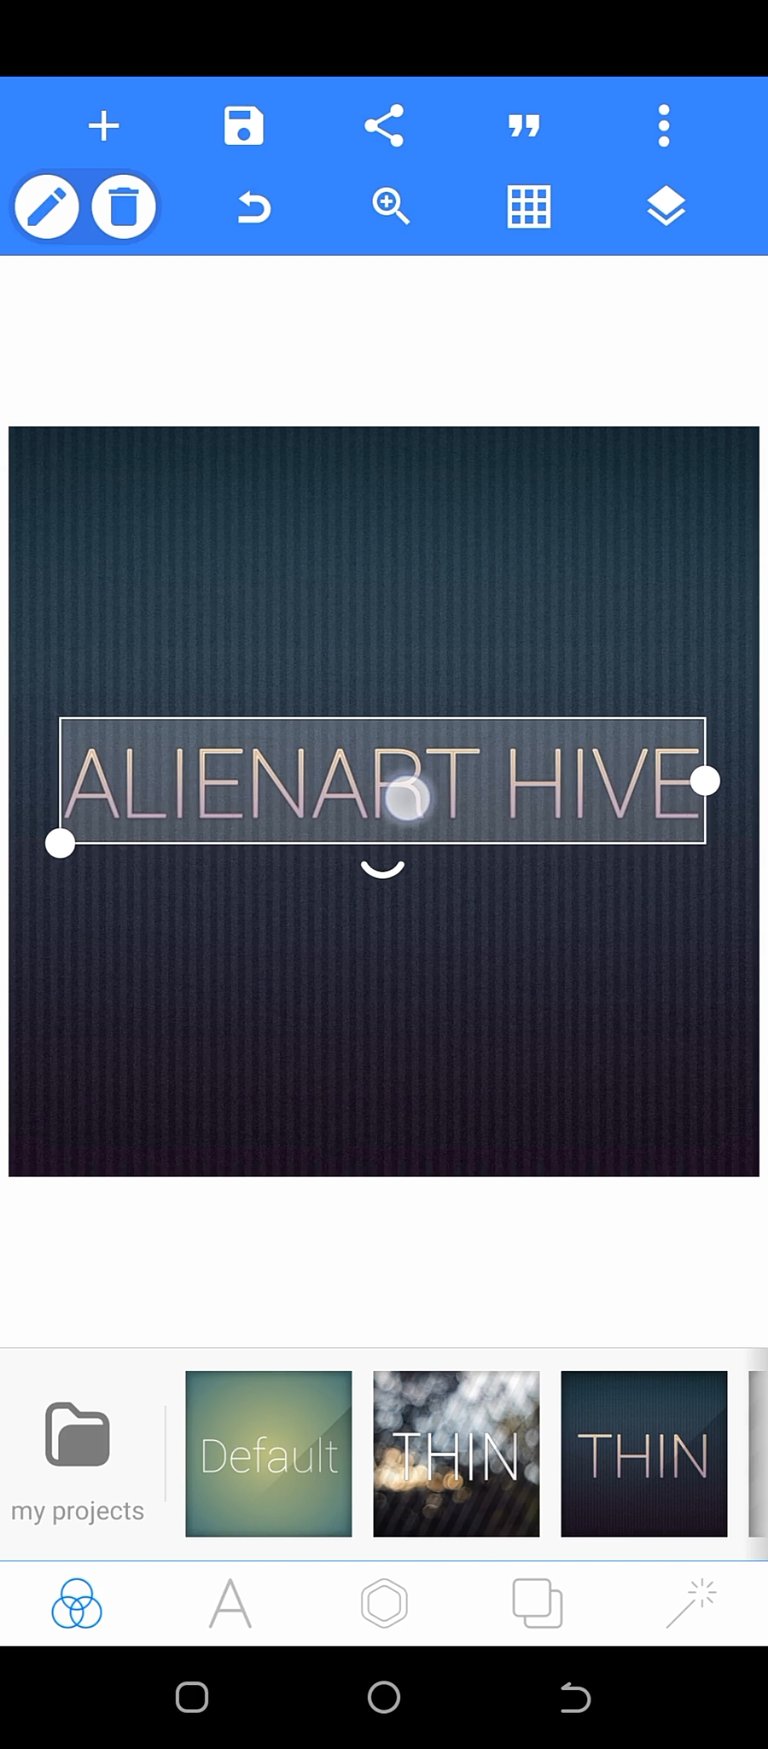
Once the text has been changed to whatever you like, you will be redirected back to the canvas where you can adjust the orientation to how you want it
Step 5
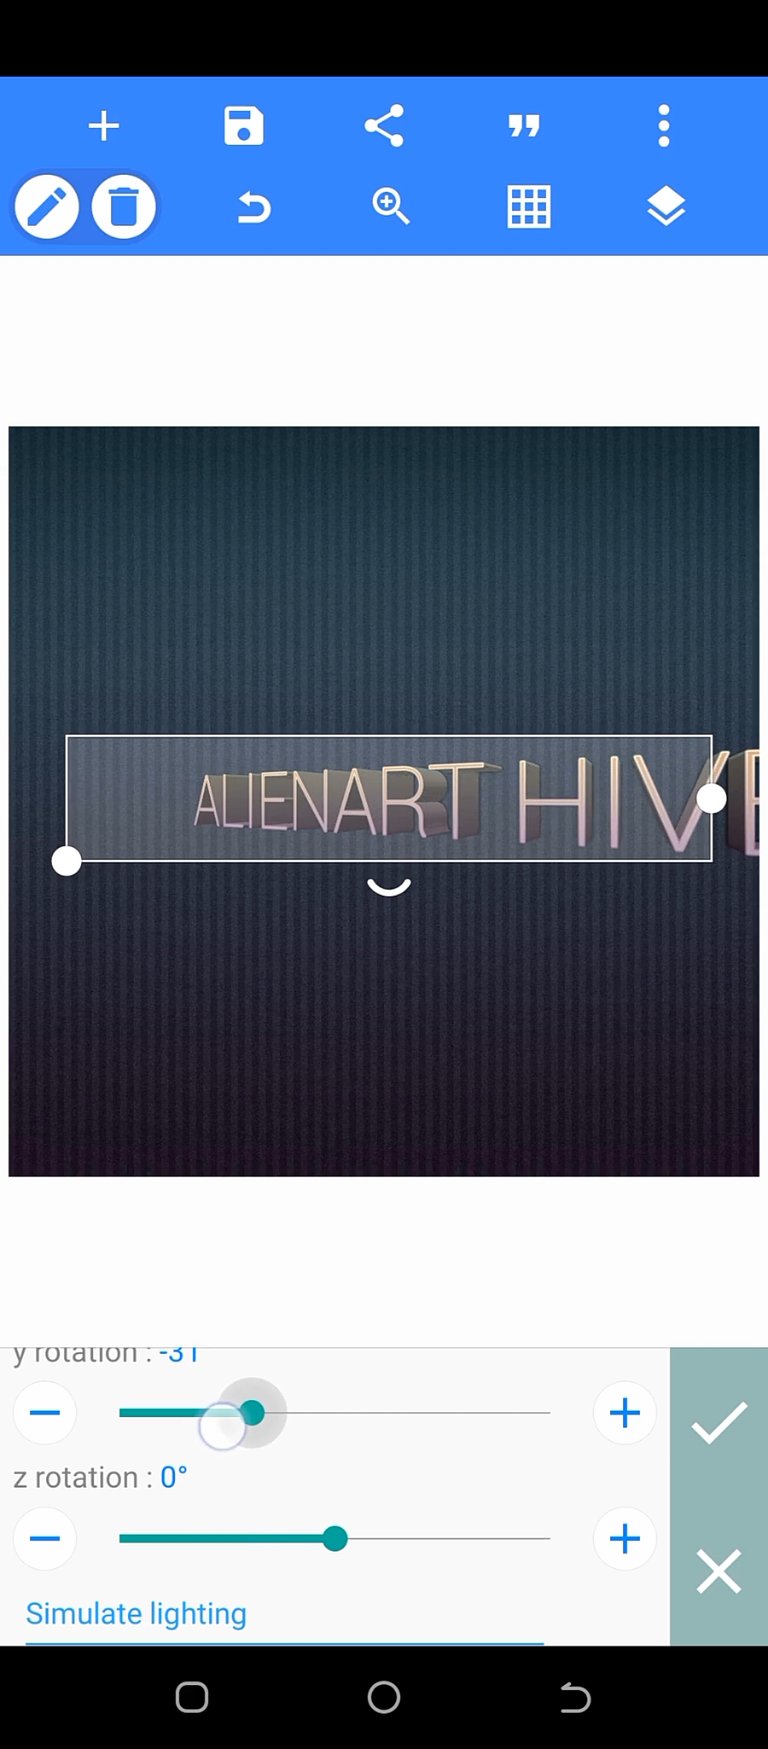
Once back in the canvas, convert the text to 3D using the 3D effect, to do this,
First select the edit tool

Swipe to the left and select the 3D effect icon as shown in the screenshot below

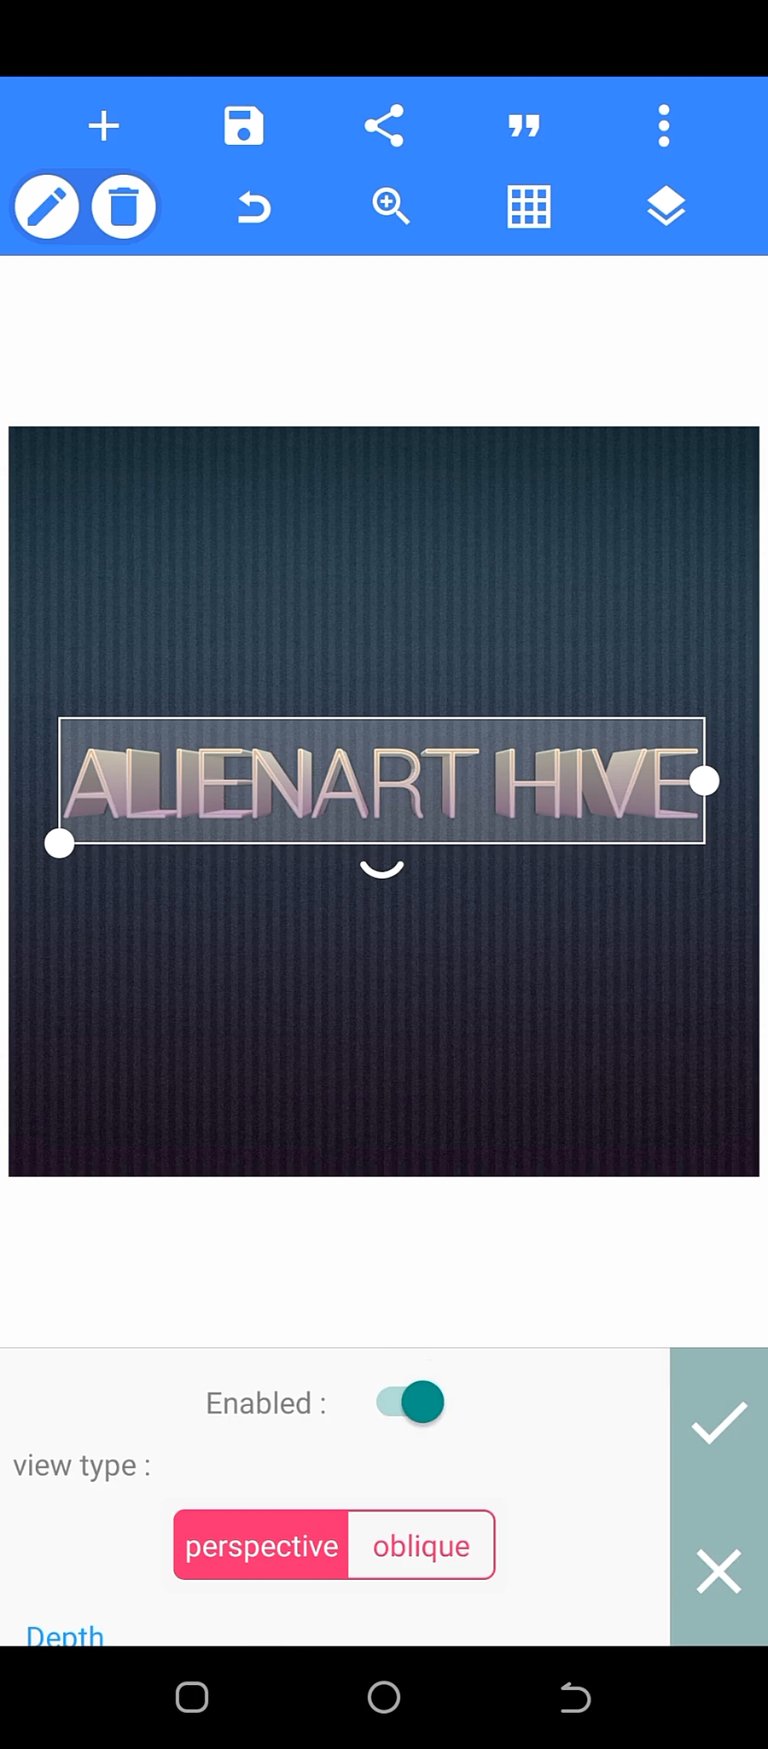
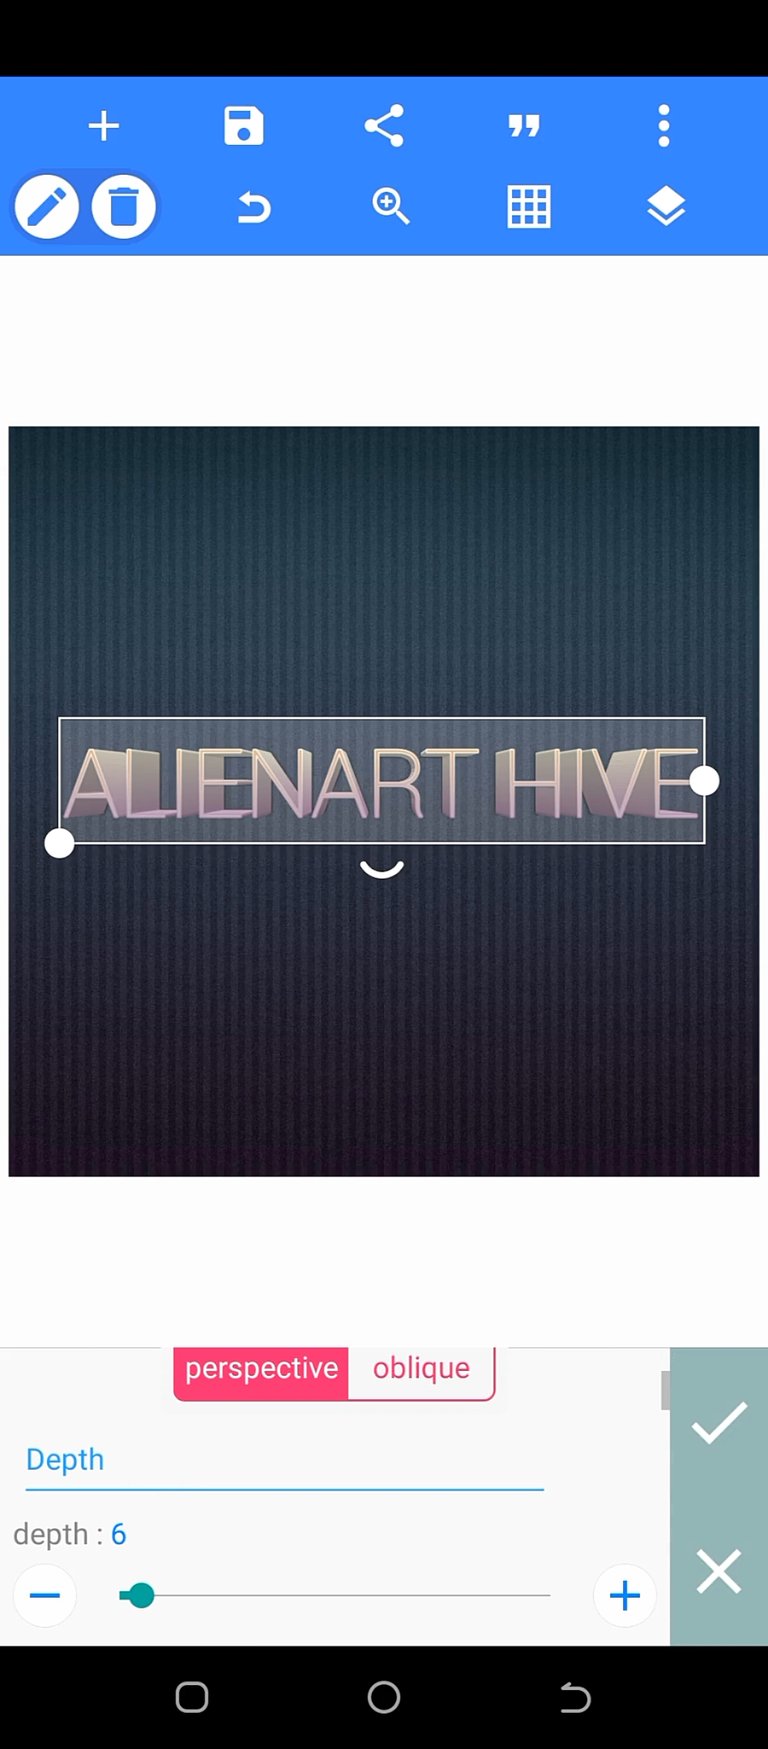
Once you have select the 3D effect, you should have the below which you can still adjust depending on how much of a 3D perspective you want it
You can adjust both the depth and the rotation along the X,Y and Z axis also shown below 👇
Step 6
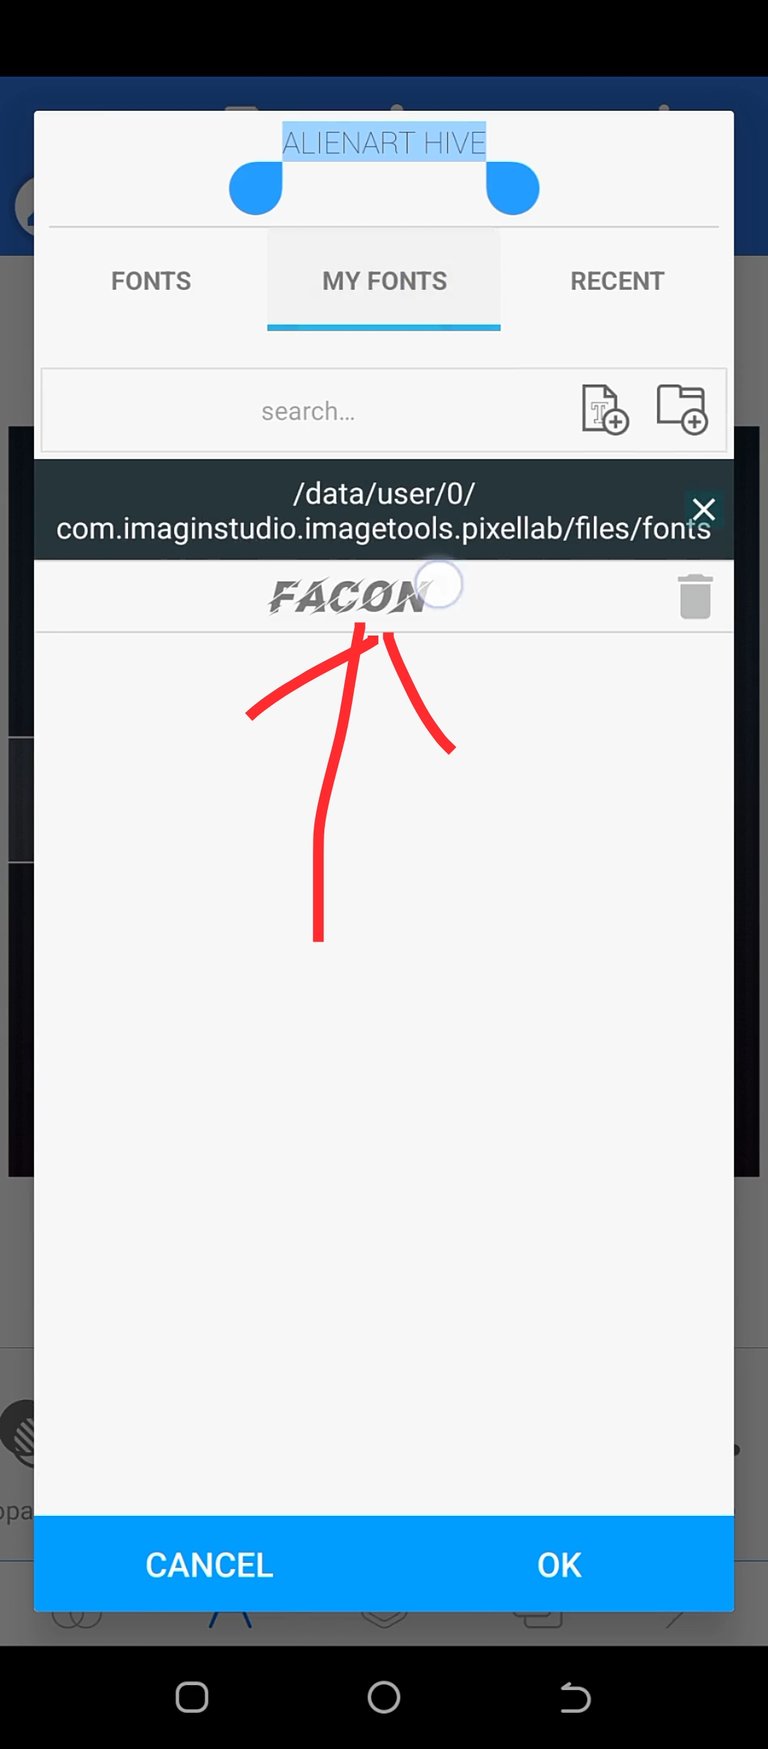
Now we have succeeded in getting a 3D view, but it still doesnt look cool yet, to make it cool, all we have to do is change the font, now select the font icon as shown below

Step 7
Once you have selected the font icon, what you do next is to select a "FACON" font type. If your pixel lab doent have a "FACON" font type, all you need to do is download it on google and add it up to pixel lab easy peasy
If you have done the above correctly you should have something similar to the below 👇. You can them adjust it to make it bigger or smaller depending on how you want it. I personally like it bigger frankly
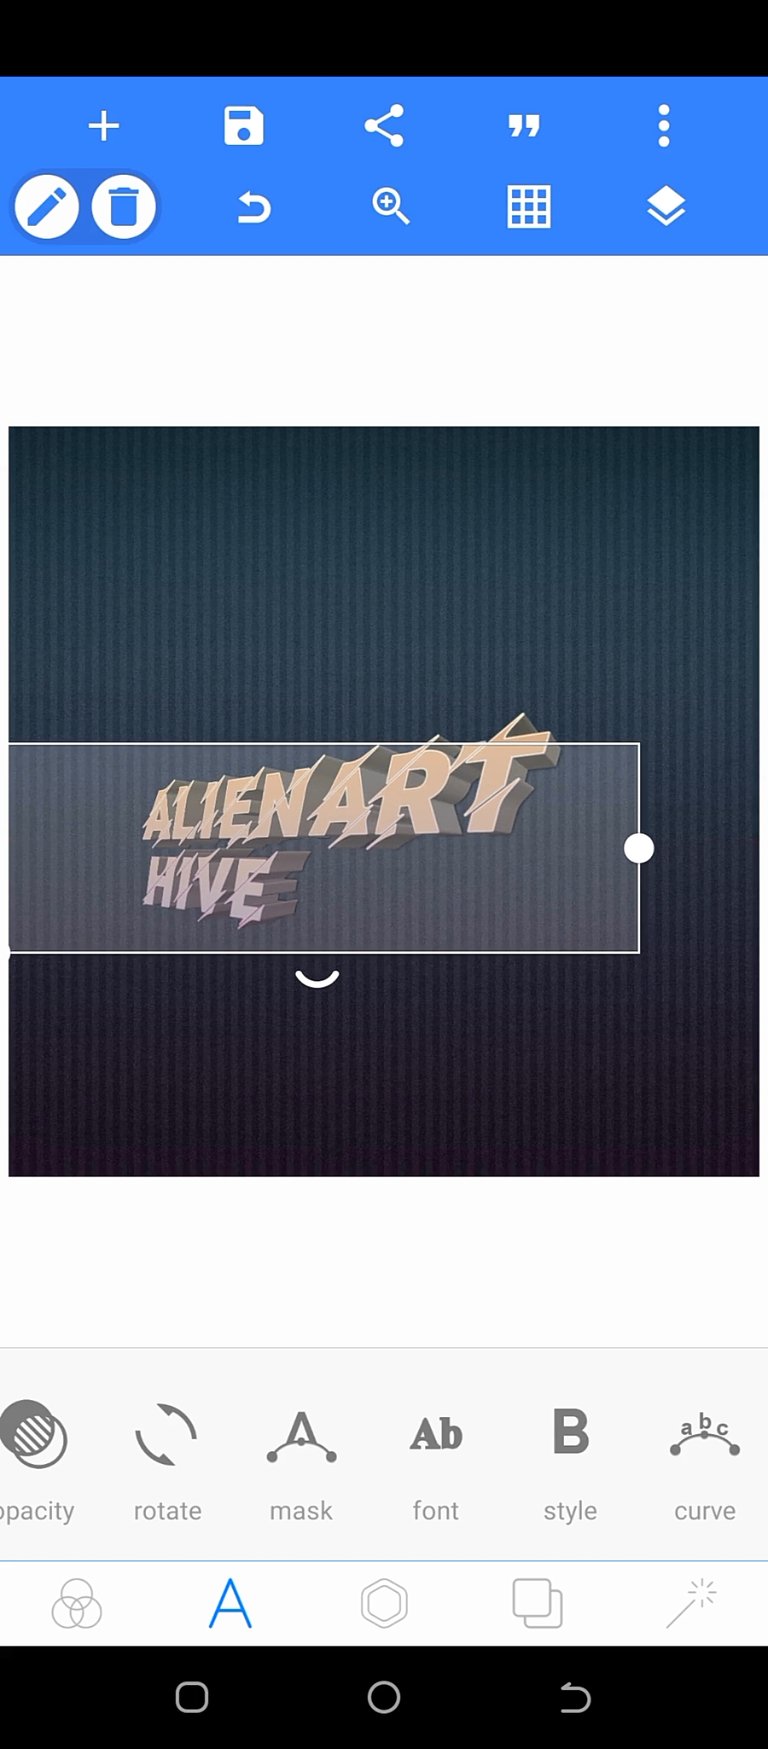

Step 8
Now we want to change the color to a brighter one, ti do this select the color icon as shown below 👇
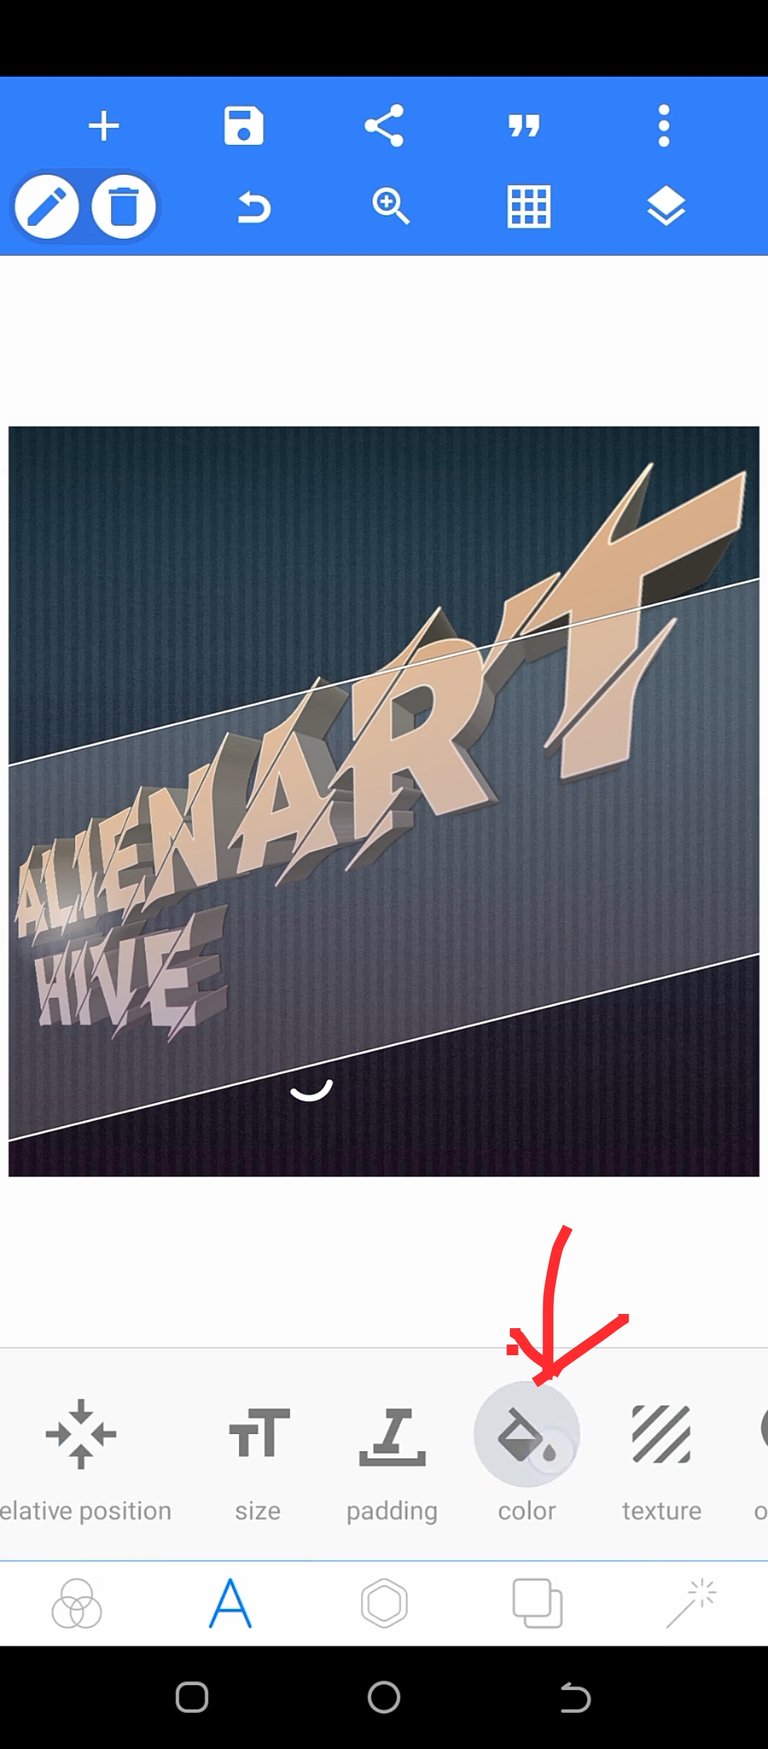
Once you select the color icon, you would be given a range of color to choose from, but to make it look better select gradient color

Adjust to your taste by moving the the center axis as indicated below 👇

Step 9
Once you have gotten your desired color with a specific gradient, you can further adjust the orientation of the design

Step 10
This step is all about making the design more elegant which can be easily achieved by:
- Adding an inner shadow
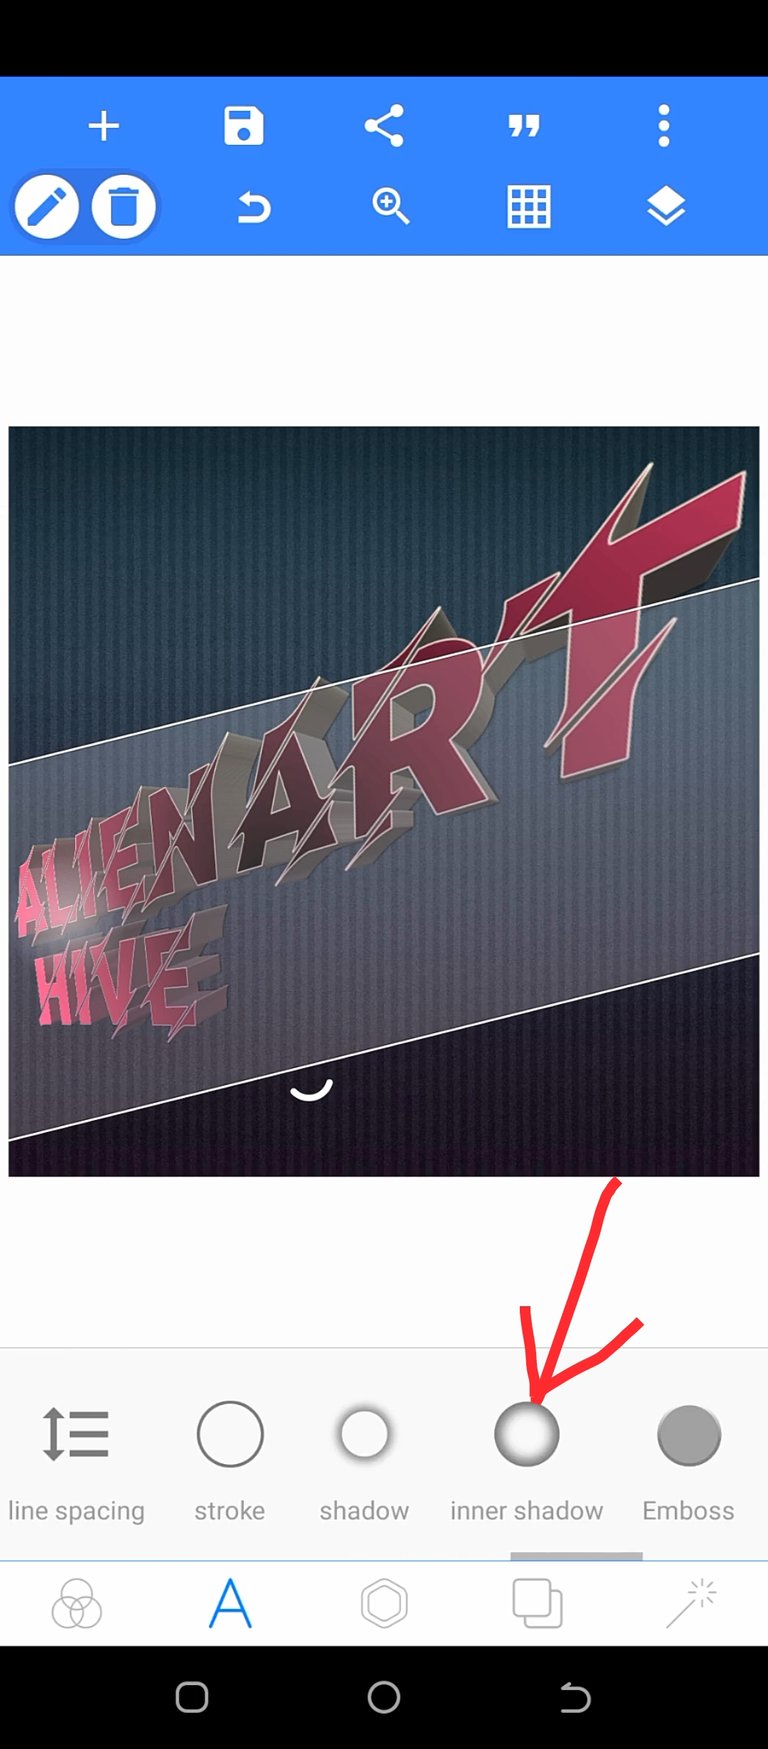
- adding a 3D shadow
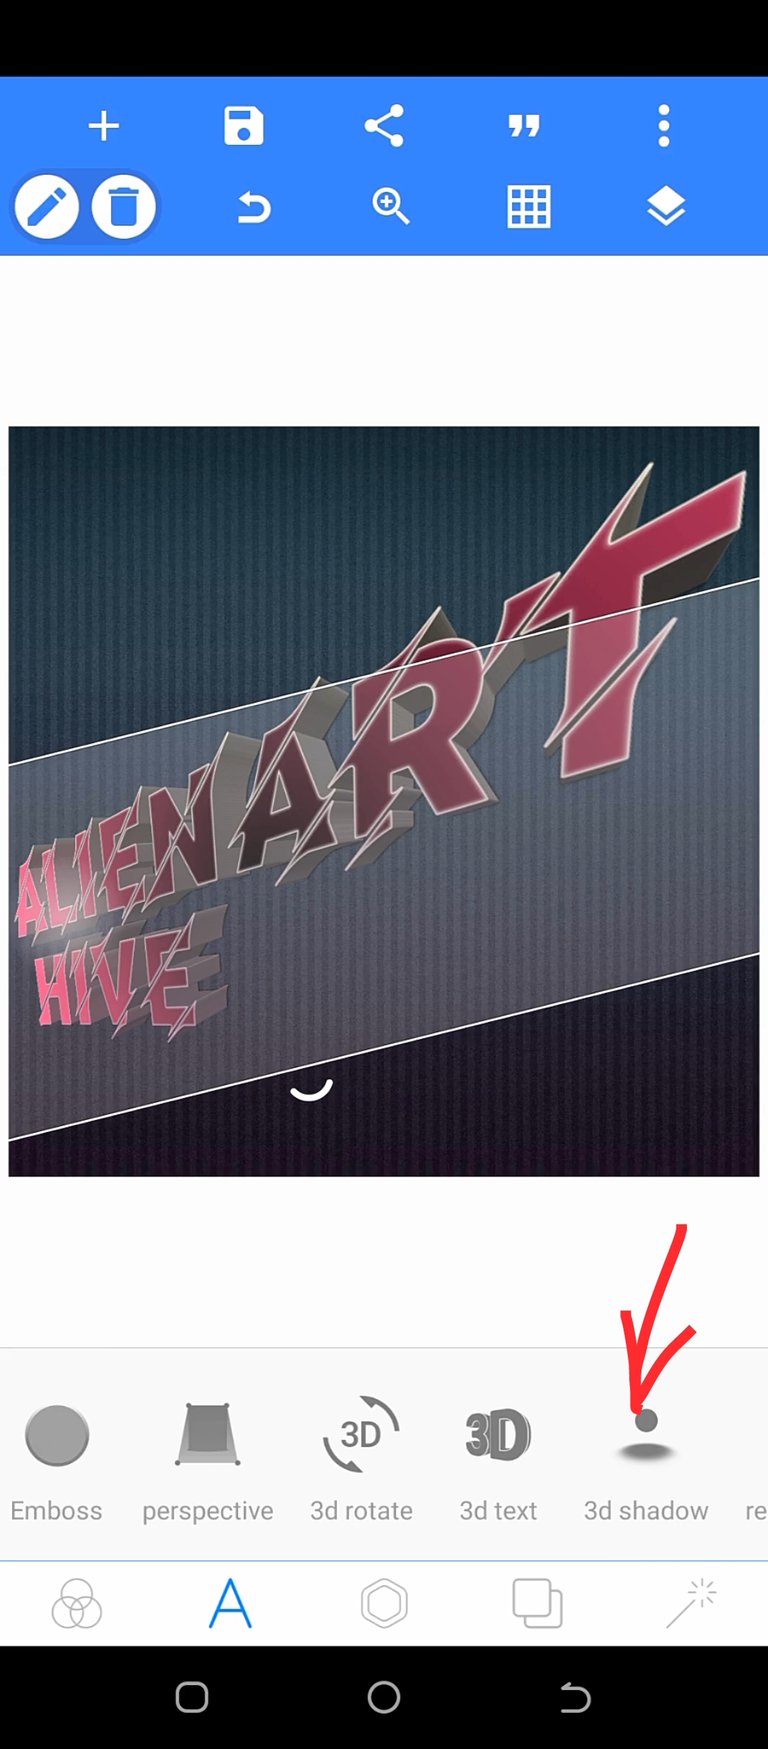
Adjust the color of the 3D shadow as to align with the design

- Adding a design reflection
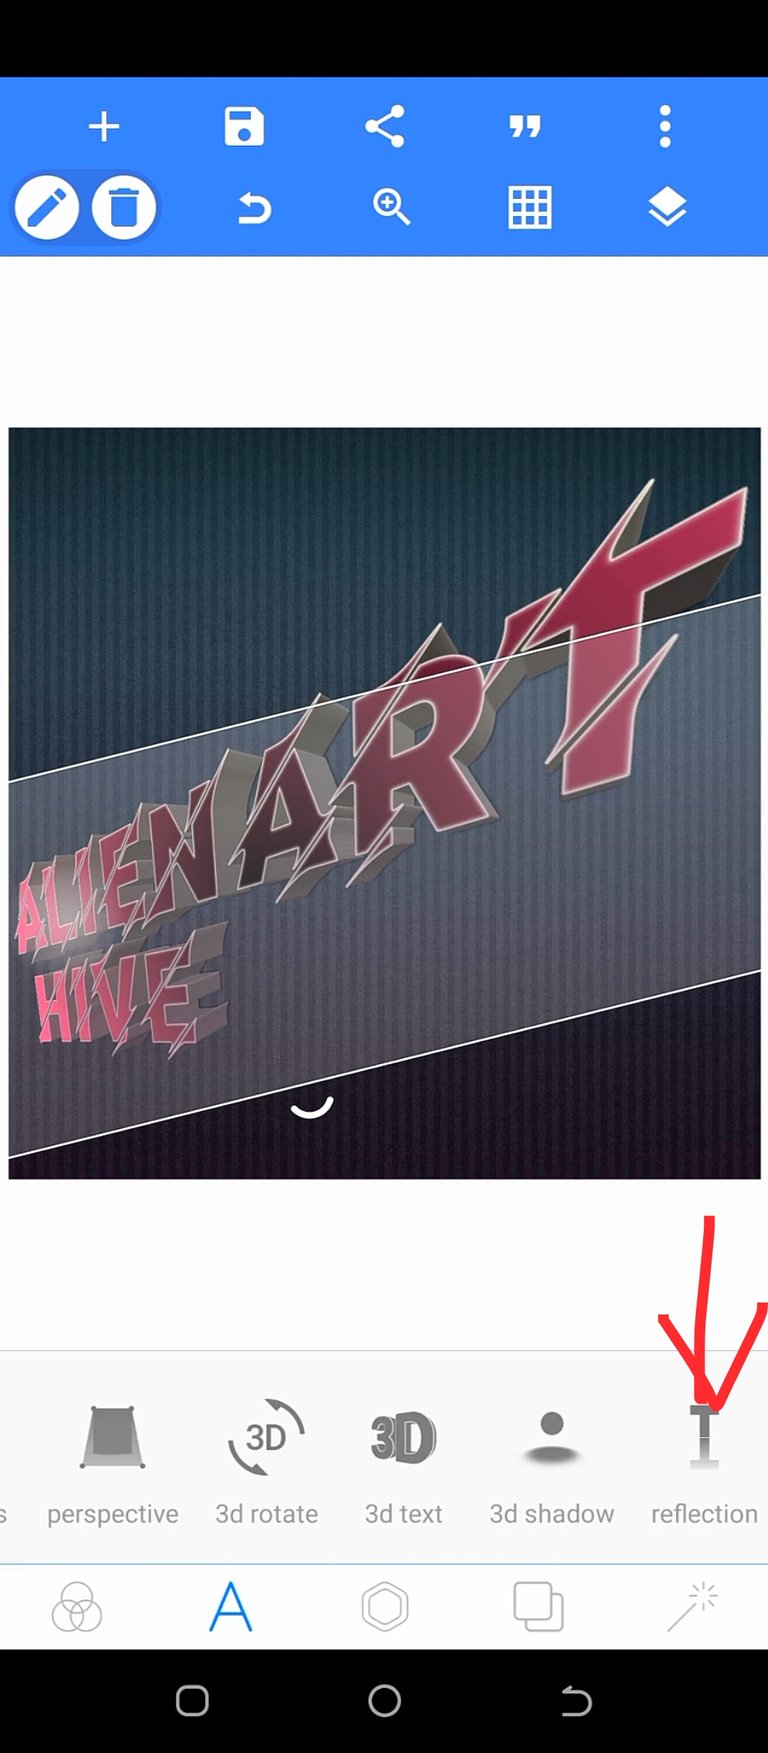
Adjust the design reflection

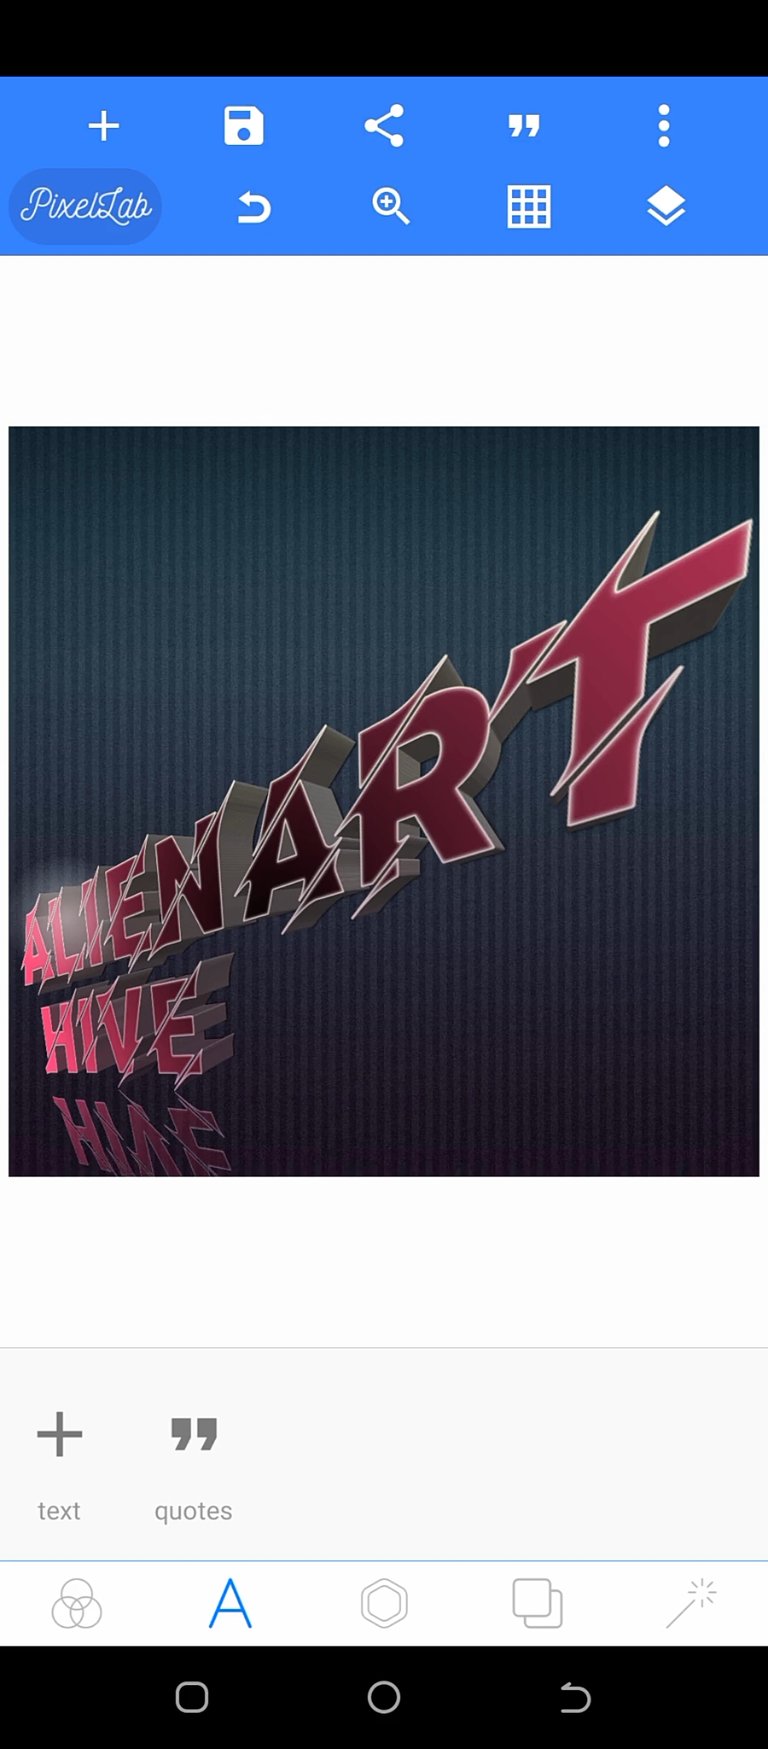
Adding a logo of hive as background
Step 11
Save your design, you can decided to save with a transparent background (png) or with a specific background (jpg) 👇
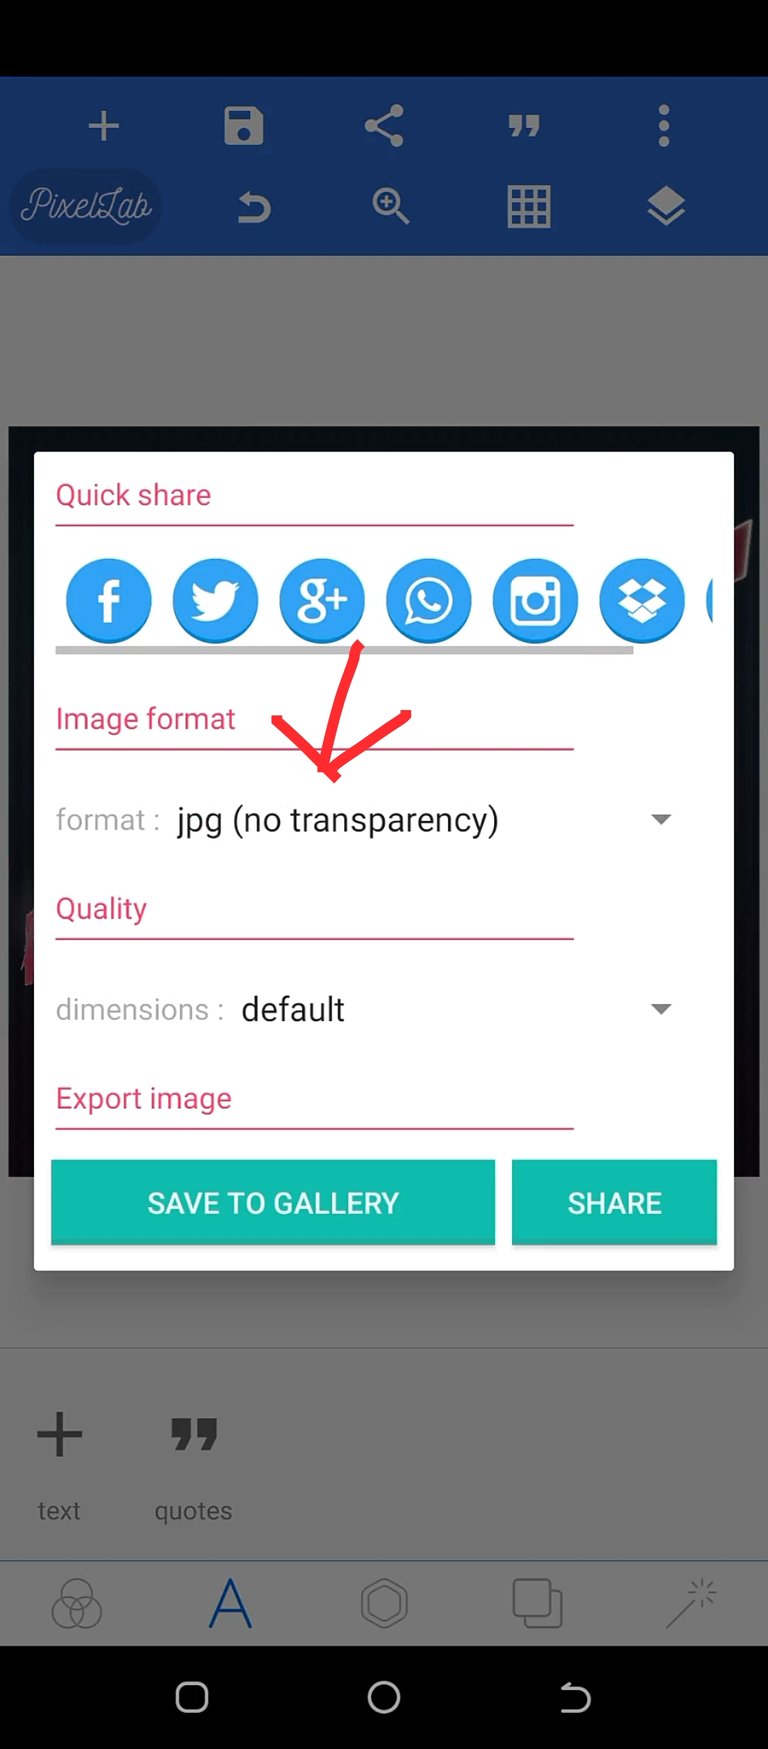

Once done you should have the following result in transparent background and non-transparent background in png or jpg image formats. Transparent is usually in png image format and vice-versa
Final design in various formats
Transparent Version without Hive logo
Background Version without Hive logo
Decided to add a Logo of HIVE as the background
Transparent (png) version
Black Background version
Yay! 🤗
Your content has been boosted with Ecency Points, by @sam9999.
Use Ecency daily to boost your growth on platform!
Support Ecency
Vote for new Proposal
Delegate HP and earn more
You've already posted the video, there is no need to create another post to talk through the same topic. You can do it in the same post.
I did that because uploading screenshots of the process alongside the video in video description wasn't possible on 3speak. I tried it, it didn't work, to be more specific, it didn't take me back to files on my computer so I could upload those screenshots. Think about it, why would I make things difficult for myself if really everything (both video and screenshots) could be done on 3speak . It was because it didn't work
There are various ways around your issue
View more