🐧#ViernesDeEscritorio. Cómo hacer USB booteable con la terminal en Linux.💻ESP/EN
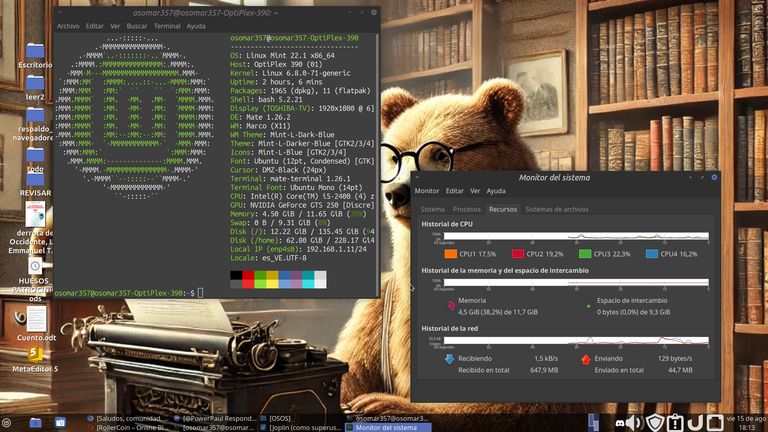
Imagen propia. / Own image.

#ViernesDeEscritorio. Cómo hacer USB booteable con la terminal de Linux.💻 | #Fridaysofescritory. How to make USB bootable with the Linux terminal.💻 |
|---|---|
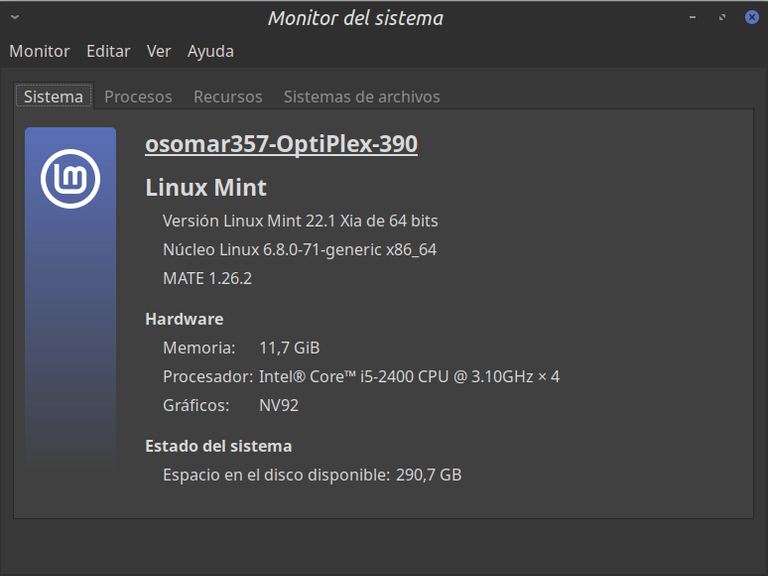
Antes que nada, cordiales saludos a toda la comunidad de Linux&SoftwareLibre. El día de hoy, en #ViernesDeEscritorio, quiero hablarles de cómo hacer una USB booteable con la terminal. La semana pasada, les había comentado que había dejado Linux Mint, para migrar a Debian 13, pero al parecer la versión que bajé, vino con fallas, y no me permitía reiniciar la PC, y tampoco era realmente compatible con Wine, y me estaba causando algunos problemas con la tarjeta de video. Después de hacer varias revisiones, apoyado por ChatGpt, llegamos a la conclusión de que había un problema con el krenel, que posiblemente llegó corrupto o fue afectado por el bajón de luz y la caída momentánea del internet cuando lo bajaba. En fin, decidí cambiarlo, y cuando lo iba a hacer, el problema que tenia lo vi más grande, ya que no me dejaba usar el paquete Gdebi, y en ese momento, decidí hacer la instalación del nuevo sistema operativo, haciendo una USB booteable, desde la terminal y así me quité, todos los problemas de encima. La USB booteable, la realice usando el comando: “dd” y en el momento que inicié el proceso, decidí tomar las imágenes, para poder explicarles en un post, todo el procedimiento. Ahora, estoy usando en la PC Linux Mint 22.1 Xia, con escritorio Mate. | First of all, warm greetings to the entire Linux&SoftwareLibre community. Today, on #ViernesDeEscritorio, I want to talk about how to make a bootable USB with the terminal. Last week, I had told you that I had left Linux Mint, to migrate to Debian 13, but apparently the version I downloaded, came with flaws, and it did not allow me to restart the PC, and it was not really compatible with Wine, and it was causing me some problems with the video card. After making several revisions, supported by ChatGpt, we came to the conclusion that there was a problem with the krenel, which possibly arrived corrupt or was affected by the power failure and the momentary drop of the internet when I was downloading it. Anyway, I decided to change it, and when I was going to do it, the problem I had I saw it bigger, since it wouldn't let me use the Gdebi package, and at that moment, I decided to do the installation of the new operating system, making a bootable USB, from the terminal and so I got rid of all the problems on top. The bootable USB, I made it using the command: "dd” and at the moment I started the process, I decided to take the images, to be able to explain in a post, the whole procedure. Now, I'm using Mint 22.1 Xia on the Linux PC, with Matte desktop. |
Captura de pantalla. / Screenshot.
Creación de la USB booteable. / Creating the bootable USB.
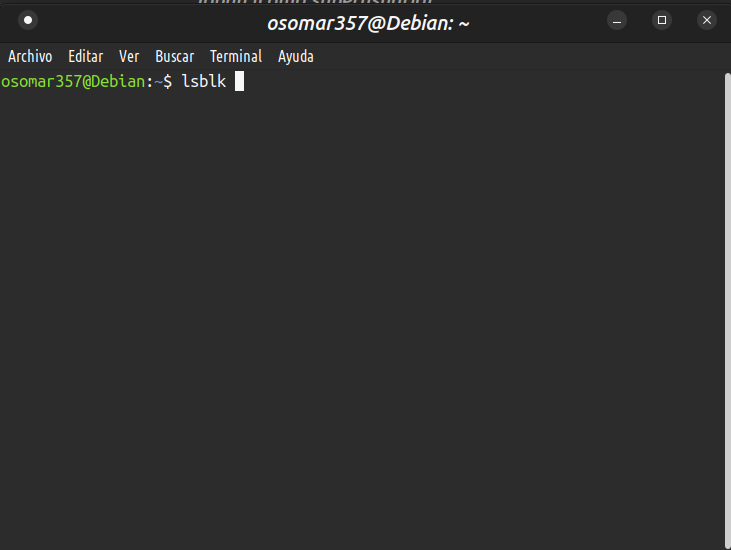
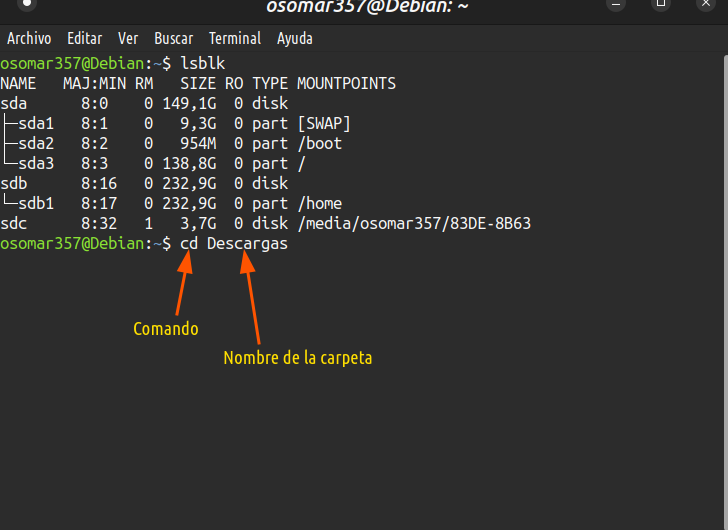
1- Usar comando: lsblk | 1- Use command: lsblk |
|---|---|
Hacerlo antes de montar la USB para identificar los discos existentes. Después de identificar los discos, inserta la memoria USB y pasa de nuevo el comando lsblk. | Do this before mounting the USB to identify the existing disks. After identifying the disks, insert the USB stick and pass the lsblk command again. |
.
Captura de pantalla. / Screenshot.
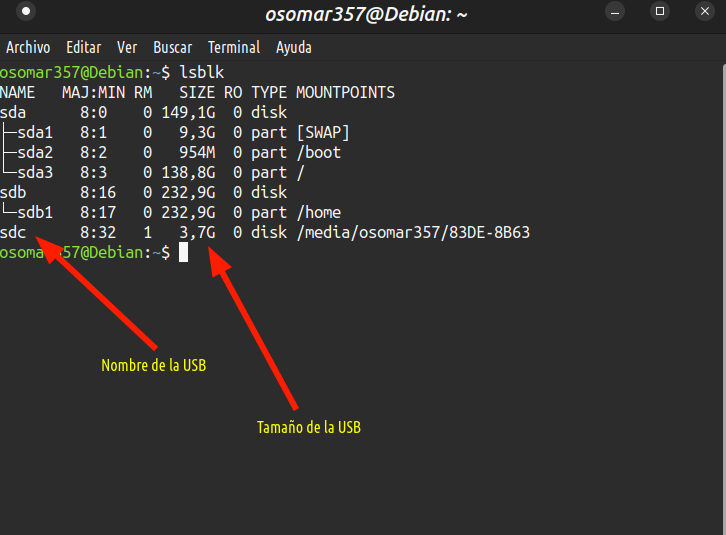
2- Identificamos el nombre de la memoria USB | 2- We identify the name of the USB stick |
|---|---|
Identifica la el nombre de tu la memoria USB, puede ser: sdb, sdc, la ltra que viene después de sd cambia según la cantidad de discos conectados. | Identify the the name of your the USB stick, it can be: sdb, sdc, the ltra that comes after sd changes according to the number of connected disks. |
Captura de pantalla. / Screenshot.
3- Dirigirse a la dirección de la carpeta. | 3- Go to the folder address. |
|---|---|
Ir a la carpeta donde tengas la ISO a través del comando: cd | Go to the folder where you have the ISO via the command: cd |
Captura de pantalla. / Screenshot.
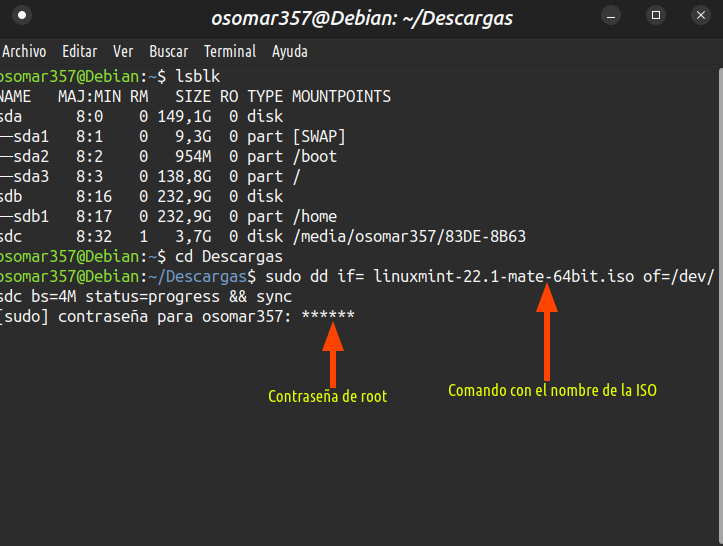
4- Estando en la carpeta donde esta la ISO creamos la memoria USB booteable | 4- Being in the folder where the ISO is we create the bootable USB stick |
|---|---|
Una vez que estamos en la carpeta donde está la ISO, vamos a crear la memoria booteble a través del comando dd. En este paso vamos colocar el comando y colocar nuestra clave root, pero explicaremos paso a paso cada proceso en el próximo punto. | Once we are in the folder where the ISO is, we are going to create the booteble memory through the dd command. In this step we are going to place the command and place our root key, but we will explain step by step each process in the next point. |
Captura de pantalla. / Screenshot.
5- Describiremos el proceso paso a paso. | 5- We will describe the process step by step. |
|---|---|
a) Para usar el comando: dd debemos hacerlo con permisos de administrador con sudo: sudo dd b) luego vamos a colocar el parámetro: if= Esto nos indica el origen de la imagen ISO, así que hay pondremos el nombre completo de la ISO que vamos a usar. c) el parametro; of= Es el destino, es decir el nombre de la memoria USB. Ejemplo: /dev/sdc d) después viene el parámetro: bs=4M Con eso, le indicamos, que queremos que la copia se haga en bloques de 4 megas, lo que nos da la seguridad de que quede perfecta. e) Luego colocamos el parámetro: status=progress Con esto, en la terminal veremos el progreso de la copia de la memoria y le haremos seguimiento. f) El último parámetro es: && sync Con esto nos aseguramos que se copie toda la información de la ISO en la memoria USB. El comando quedaría así: | a) To use the command: dd we need to do it with admin permissions with sudo: sudo dd b) then we are going to place the parameter: if= This tells us the source of the ISO image, so there we will put the full name of the ISO we are going to use. (c) the parameter; of= It is the destination, i.e. the name of the USB stick. Example: /dev/sdc d) then comes the parameter: bs=4M With that, we indicate that we want the copy to be made in blocks of 4 megabytes, which gives us the assurance that it will be perfect. e) Then we put the parameter: status=progress With this, in the terminal we will see the progress of the memory copy and we will follow it up. f) The last parameter is: && sync With this we make sure that all the ISO information is copied to the USB stick. The command would look like this: |
sudo dd if=nombre_completo_de_la_iso of=/dev/sdc bs=4M status=progress && sync
Captura de pantalla. / Screenshot.
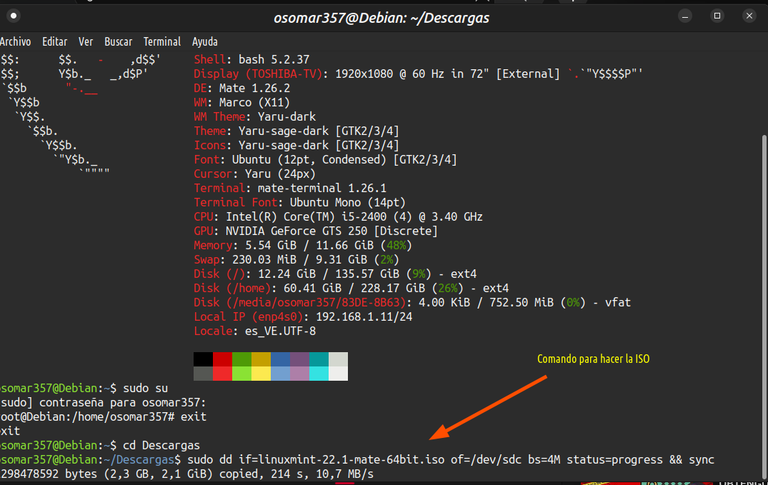
5- Se realiza el proceso de la creación de la memoria UBS booteable. | 5- The process of creating the UBS bootable memory is performed. |
|---|---|
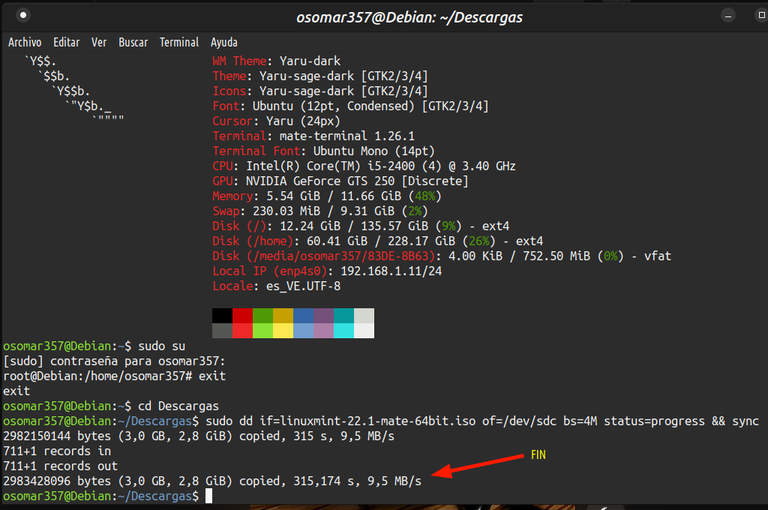
Después de escribir el comando, le damos a la tecla “Enter” y se nos pedirá nuestra contraseña, la colocamos y esperamos a que se cree la ISO en la memoria USB. El tiempo es relativamente rápido, pero se tarda más, cuando el tamaño que tiene la memoria ISO es mas grande. Cuando el proceso termina, se verá, como se muestra en la imagen. | After typing the command, we hit the "Enter" key and we will be asked for our password, we put it and wait for the ISO to be created on the USB stick. The time is relatively fast, but it takes longer, when the size of the ISO memory is larger. When the process ends, it will look, as shown in the picture. |
Captura de pantalla. / Screenshot.
Despedida. | Farewell. |
|---|---|
Espero que este tutorial sea de ayuda para todos. Muchas gracias por leerme y mis mejores deseos | I hope this tutorial is helpful for everyone. Thanks a lot for reading me and best wishes |
Translated with www.yandex.com

Crece en Hive con el apoyo de Crypto Company.

#Archon, es una comunidad que apoya proyectos, resuelve problemas, y te ayuda a crecer en Hive.
Visita su Discord, tienen un chat en español.


[@PowerPaul:]
Hey! Because of your participation in the @CryptoCompany community and your participation in the "Banner for Boost" campaign you received a vote from your CryptoCompany and its trail! Thank you & Hive a great day!
Recent posting from @PowerPaul or the CryptoCompany network:
by @cryptocompany
by @powerpaul
by @powerpaul
¡Enhorabuena!
✅ Has hecho un buen trabajo, por lo cual tu publicación ha sido valorada y ha recibido el apoyo de parte de CHESS BROTHERS ♔ 💪
♟ Te invitamos a usar nuestra etiqueta #chessbrothers y a que aprendas más sobre nosotros.
♟♟ También puedes contactarnos en nuestro servidor de Discord y promocionar allí tus publicaciones.
♟♟♟ Considera unirte a nuestro trail de curación para que trabajemos en equipo y recibas recompensas automáticamente.
♞♟ Echa un vistazo a nuestra cuenta @chessbrotherspro para que te informes sobre el proceso de curación llevado a diario por nuestro equipo.
Cordialmente
El equipo de CHESS BROTHERS
@osomar357, I'm refunding 0.235 HIVE and 0.048 HBD, because there are no comments to reward.